

Oh Pinterest, you give so many ideas, but often I never do anything with them! I love trying new recipes, crafts, sewing ideas, etc. Of course, it is easy on pinterest to pin things and never make them. I recently have been seeing a trend with color blocking where for instance you have a top half of a dress a bright blue and the bottom a black or something along those lines. I have seen it done tastefully a few times, but most of the time if just looks weird or makes the person look top heavy or bottom heavy. I also have a problem with the fact that I tend to lean toward wearing solids. I love patterns and different colors, but since I am always looking for cheap clothes, nice patterns don’t fall in that budget often. For the first 4 years of marriage Grant and I didn’t buy clothes or have a clothing budget. Why you might ask; well one, we were poor and didn’t have any extra money, and if we did it went to paying off our student loans since we wanted to be debt free as soon as possible. Two, honestly we didn’t need clothes. our clothes only started getting holes or falling apart after around 4 years of continuous wear. If we really needed something like undies or socks, we would find a way to buy those things, but always by lowering another budget by that amount. Obviously it wasn’t always fun to not have new clothes, but it was a great way to see how blessed we still were. Now that we have a clothing budget we still try to not be crazy about buying things we don’t need. Anyway, below is my tutorial for diagonal color block shirts that I found inspiration for on pinterest!
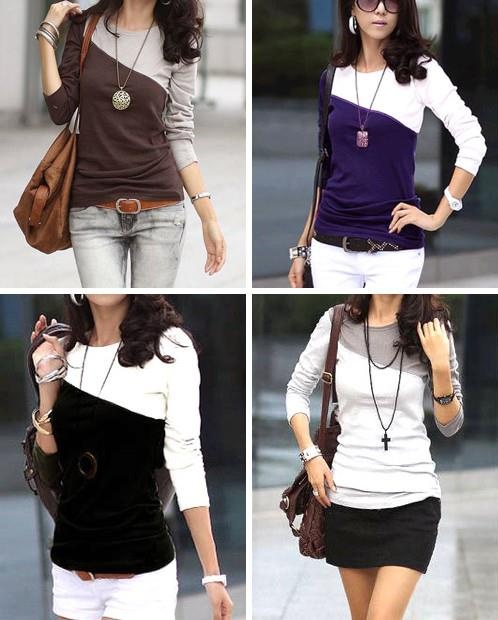
I saw this image on pinterest, and I really loved this look and thought it should be easy to make.
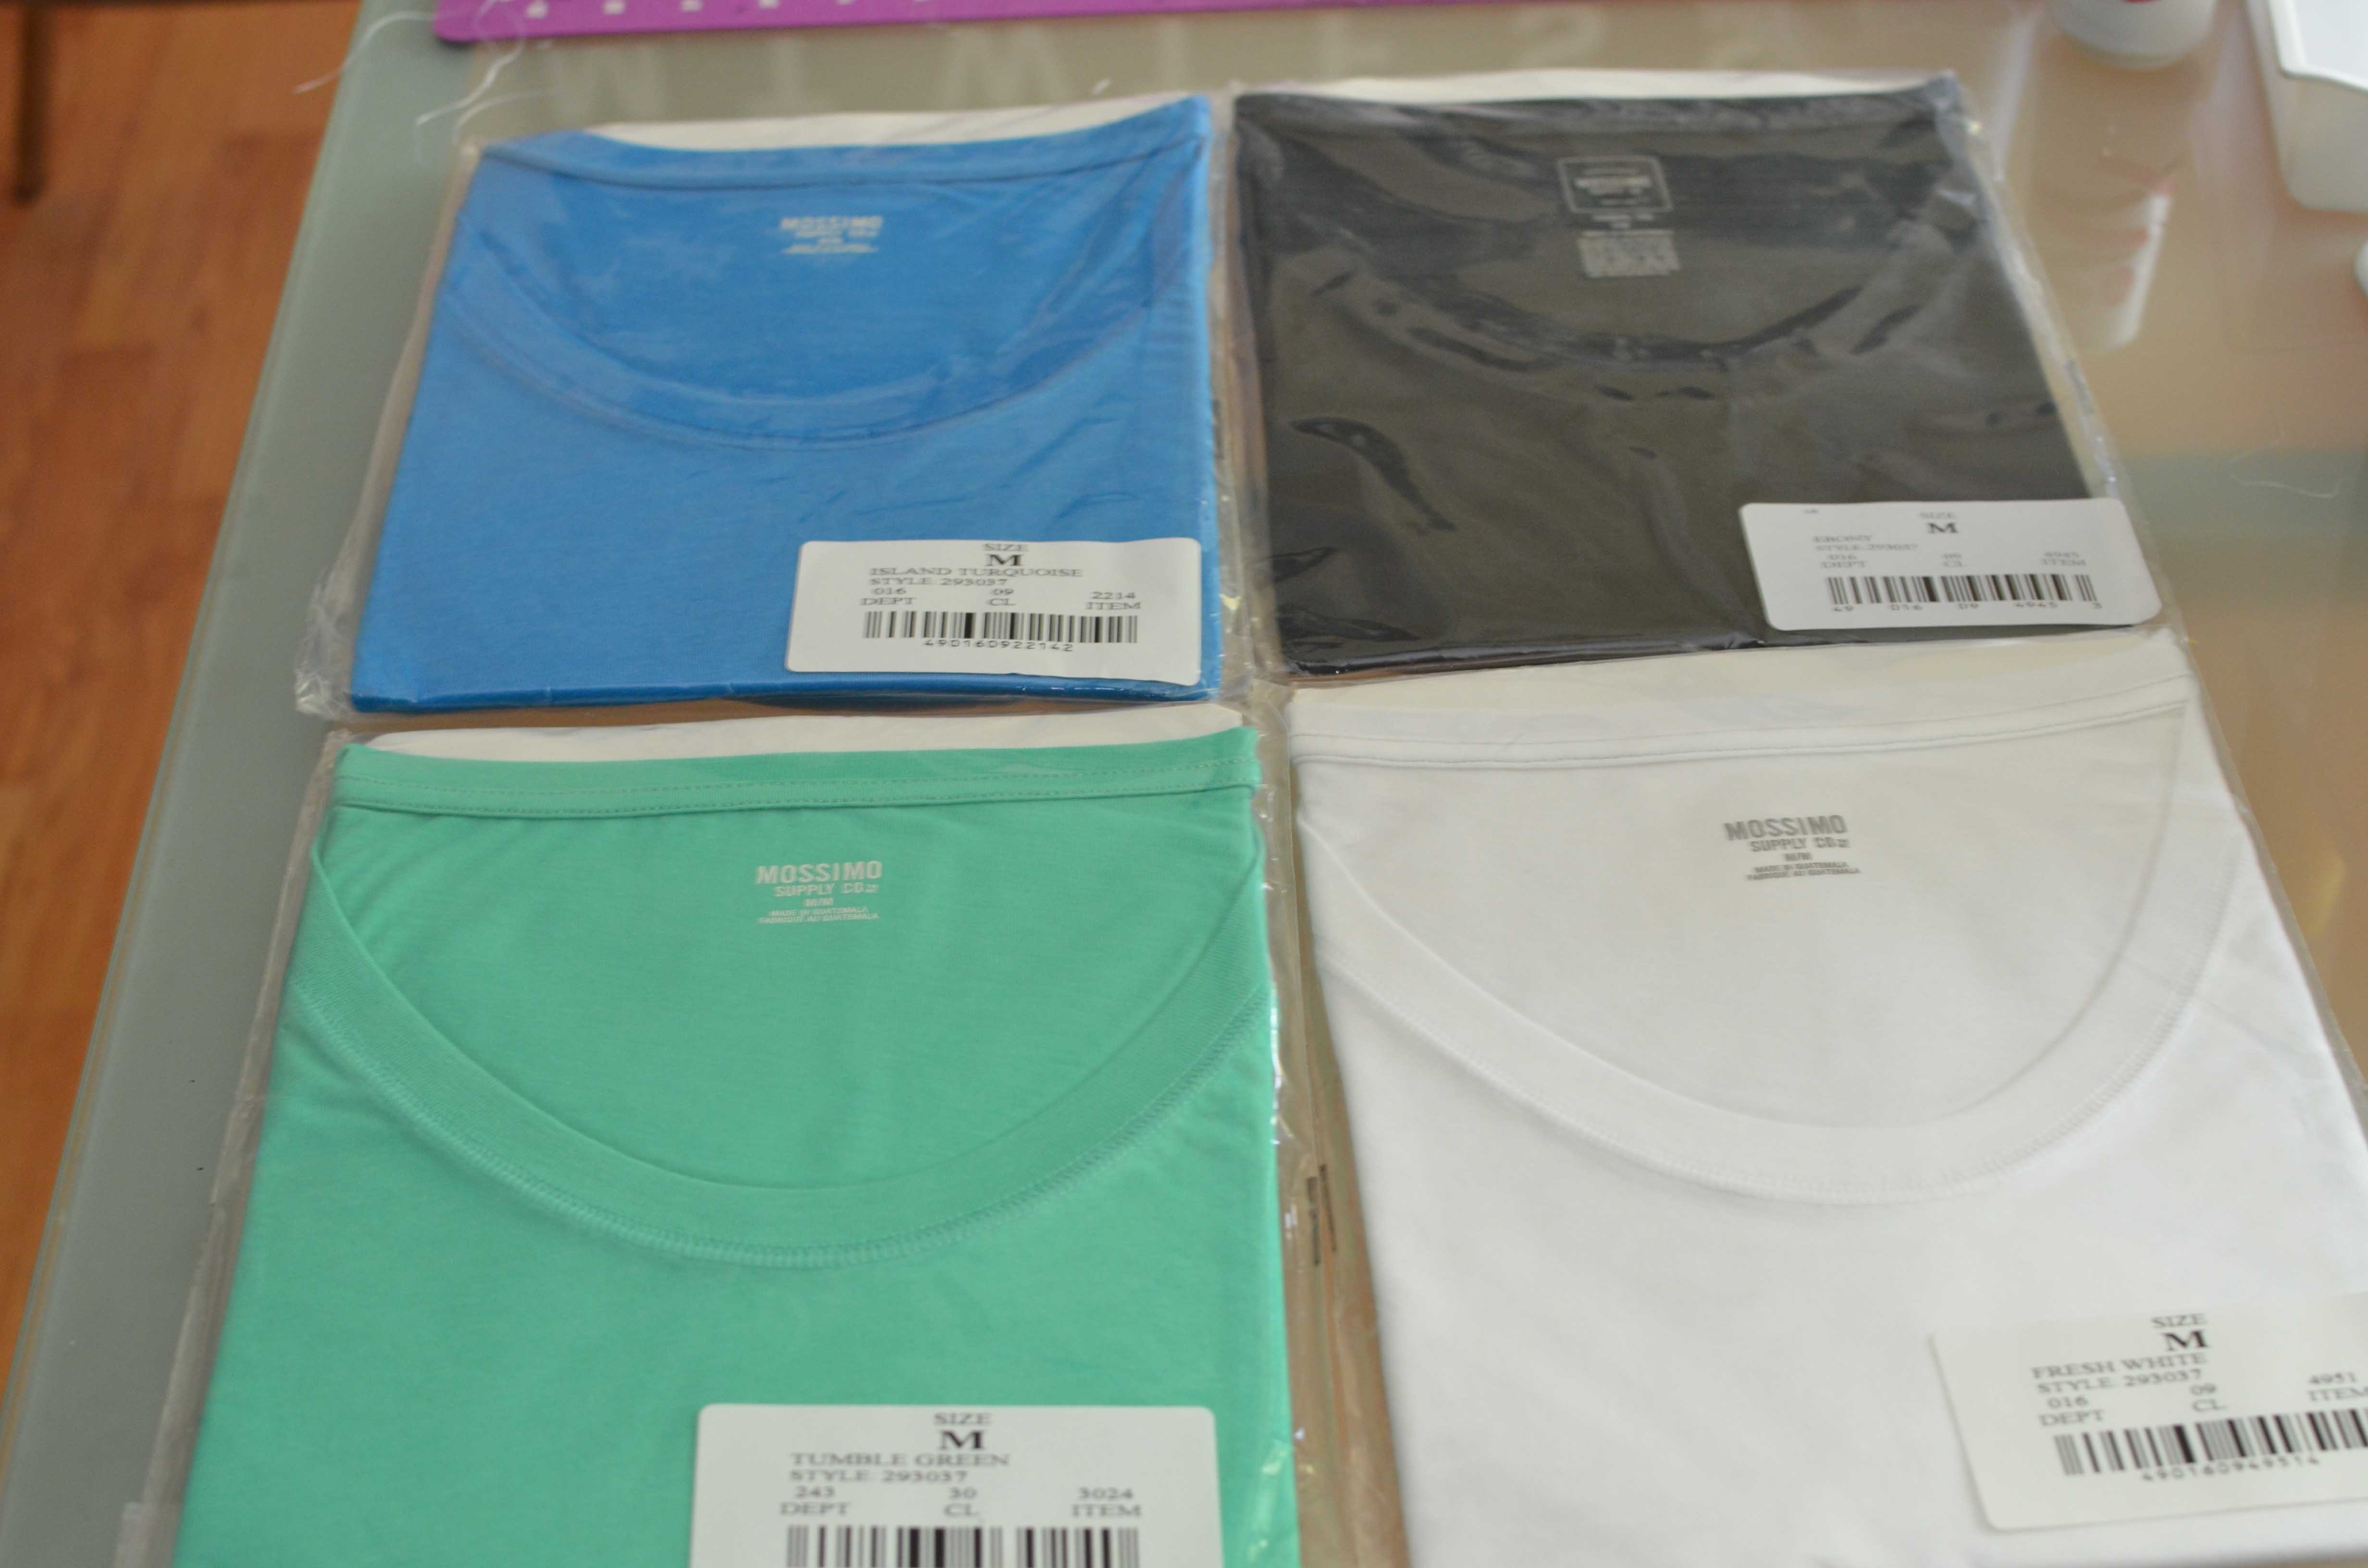
So I kept my eyes open, and Target had a sale on these long sleeved shirts for $6.00 a piece which is cheaper than I could get the fabric for. I hate seeing tutorials online where they are messing up a $20-30 dollar shirt. I mean shoot if I am gonna spend $20 bucks on a shirt it better be exactly how I want it to be. Anyway…
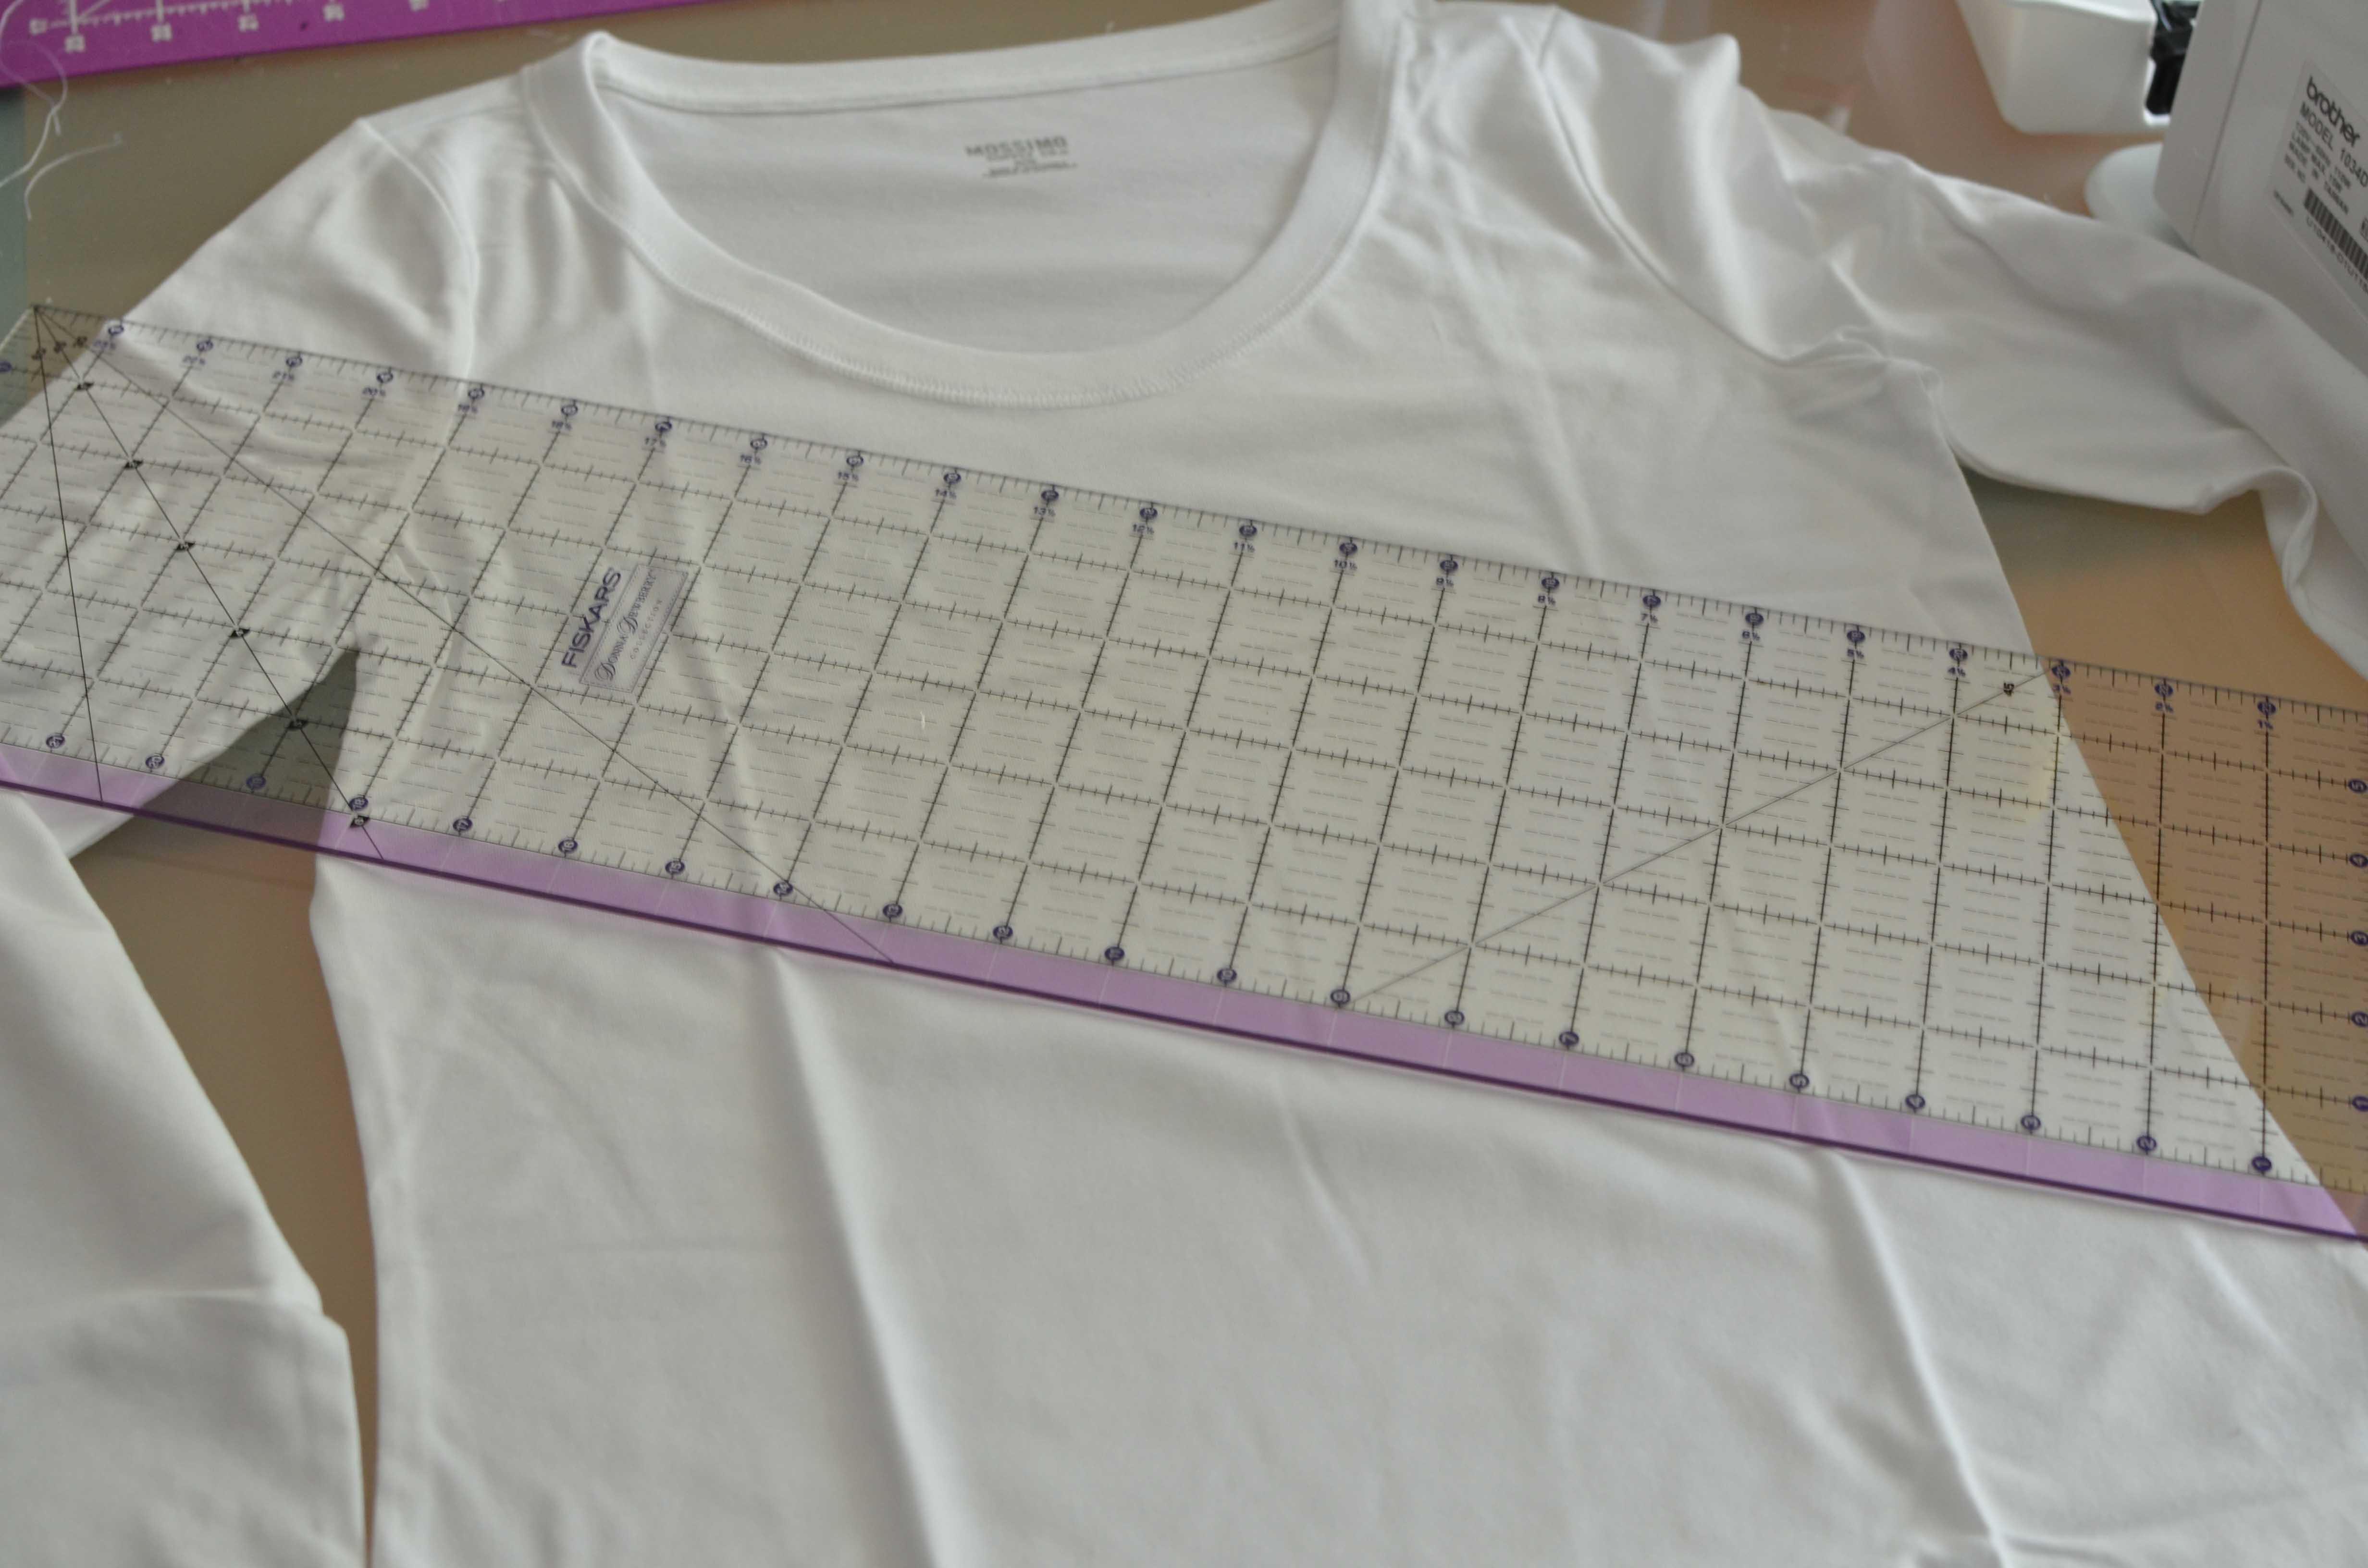
I used this clear ruler to decide what angle I wanted it to be.
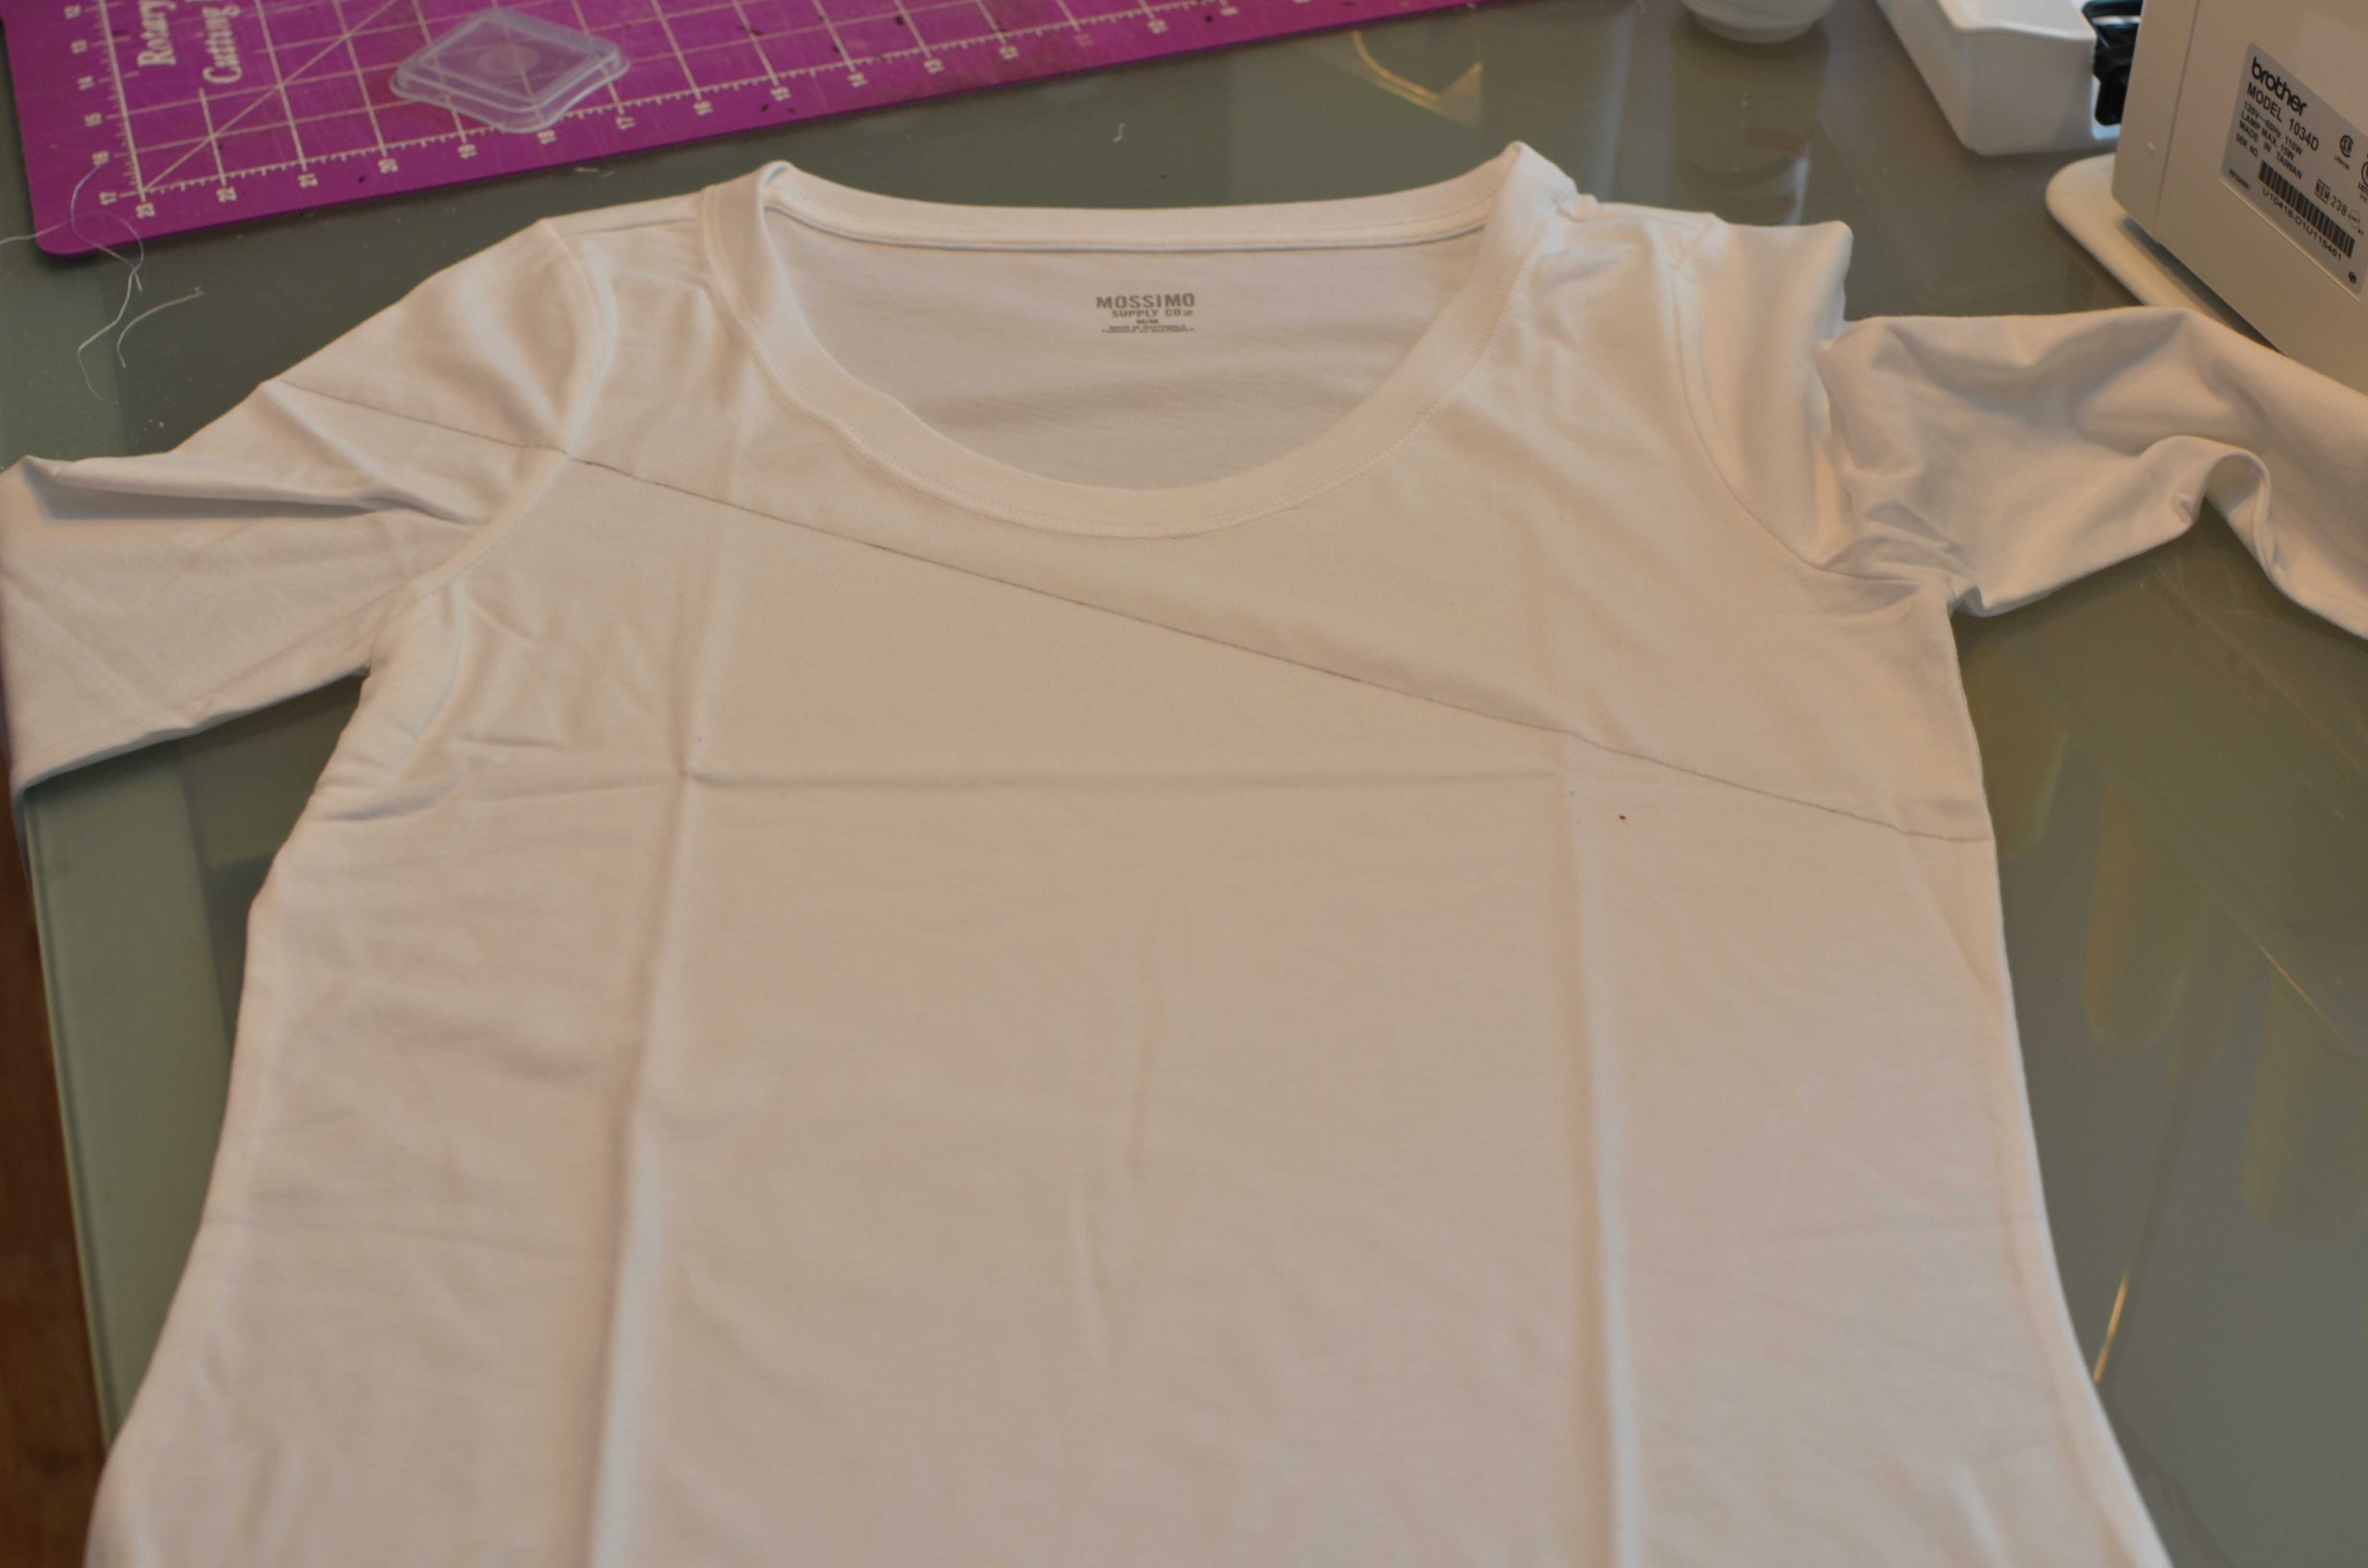
I then drew on the shirt with a charcoal pencil.
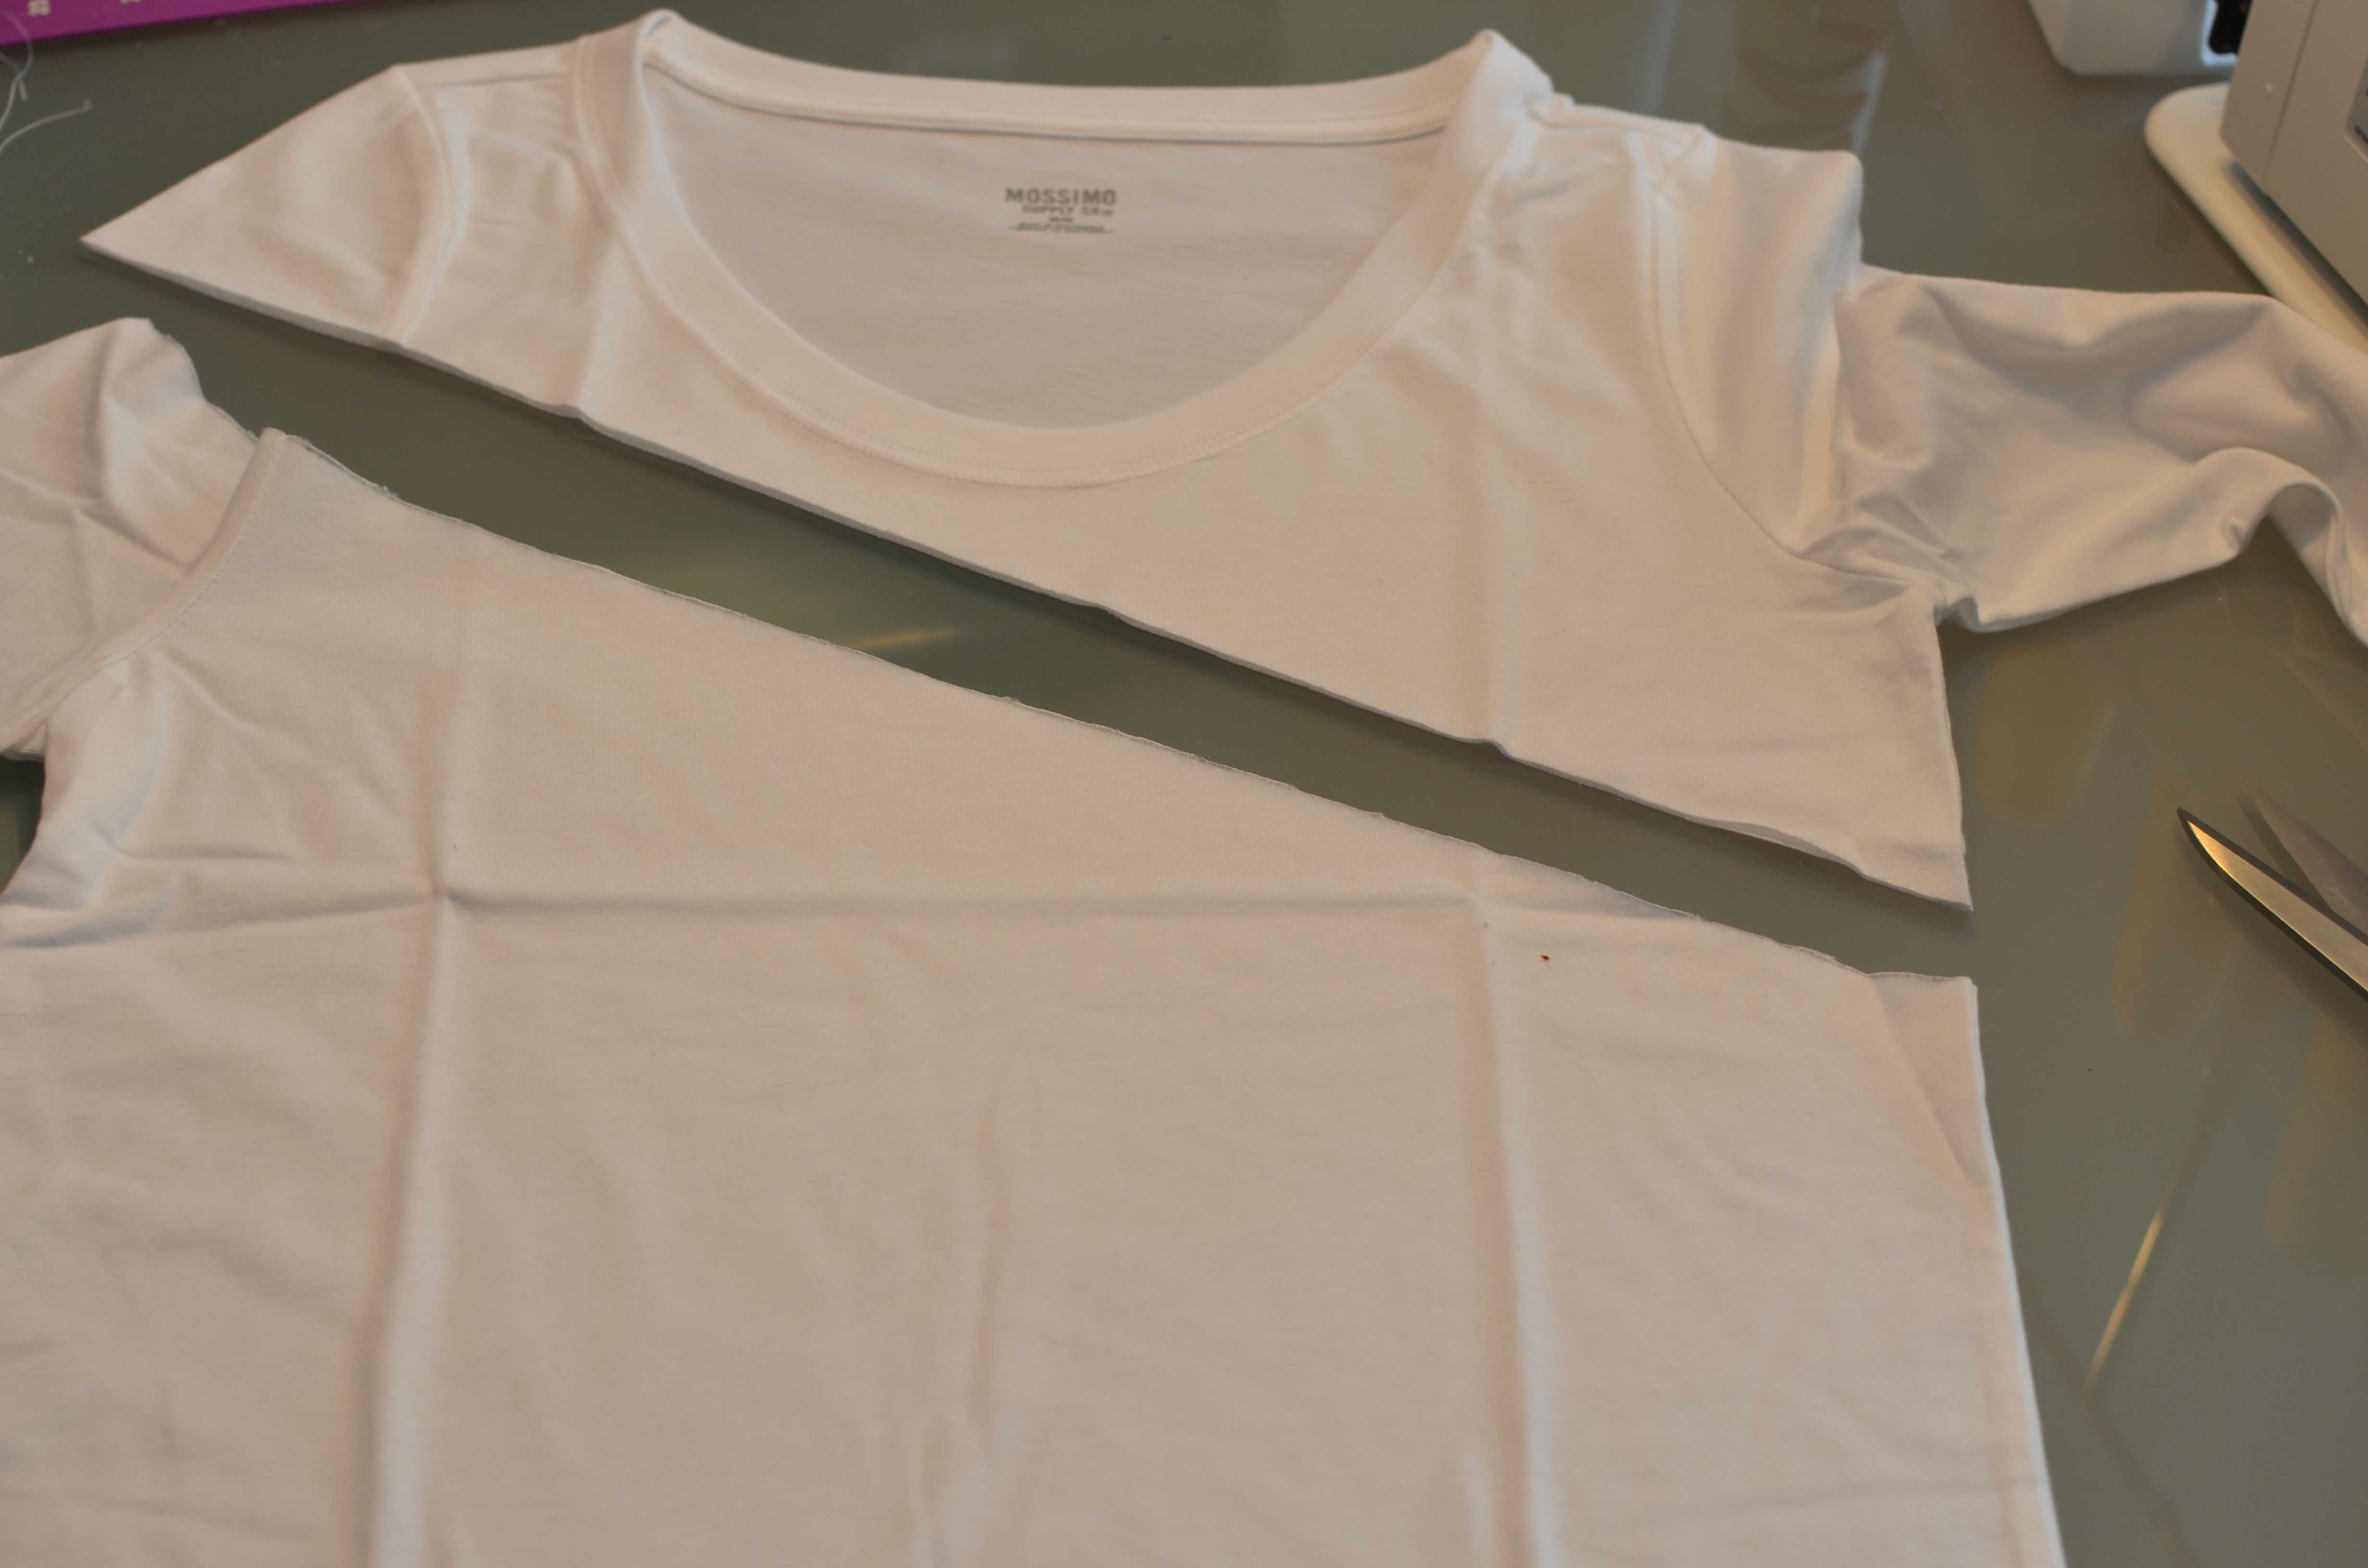
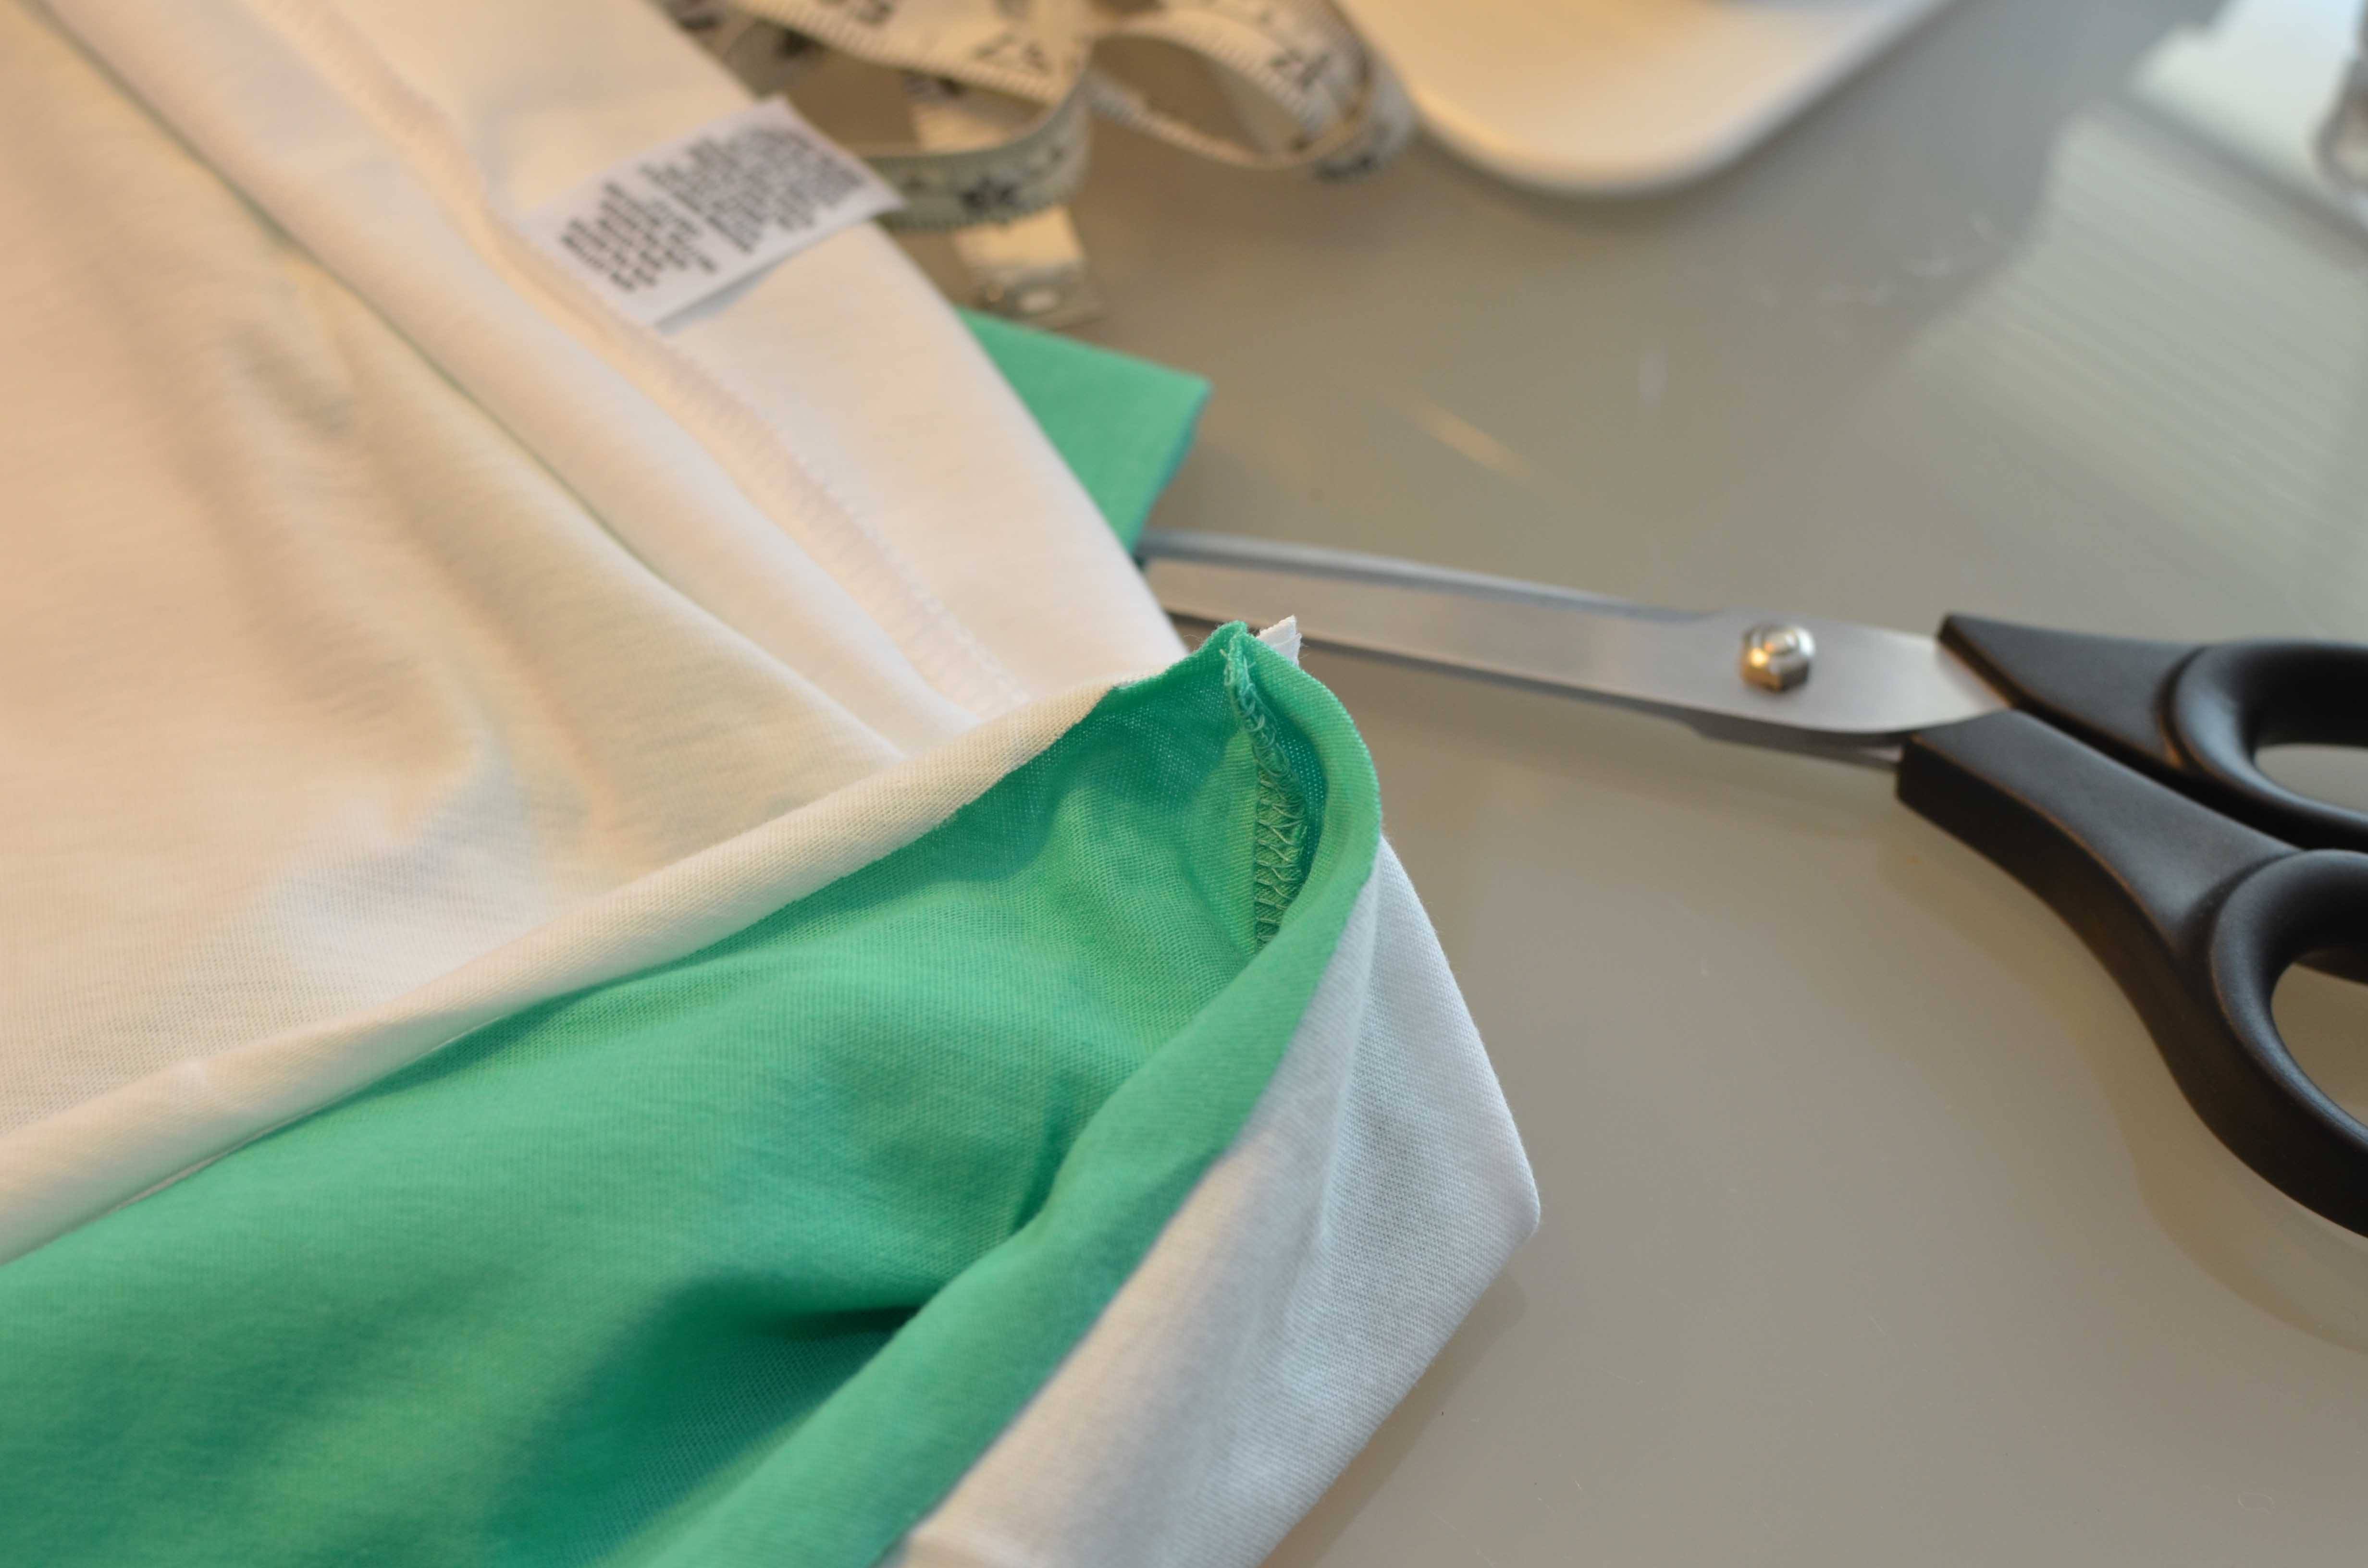
Then the scary part, cut the shirt.

I then laid the top part on the other shirt and was careful to line everything up correctly.
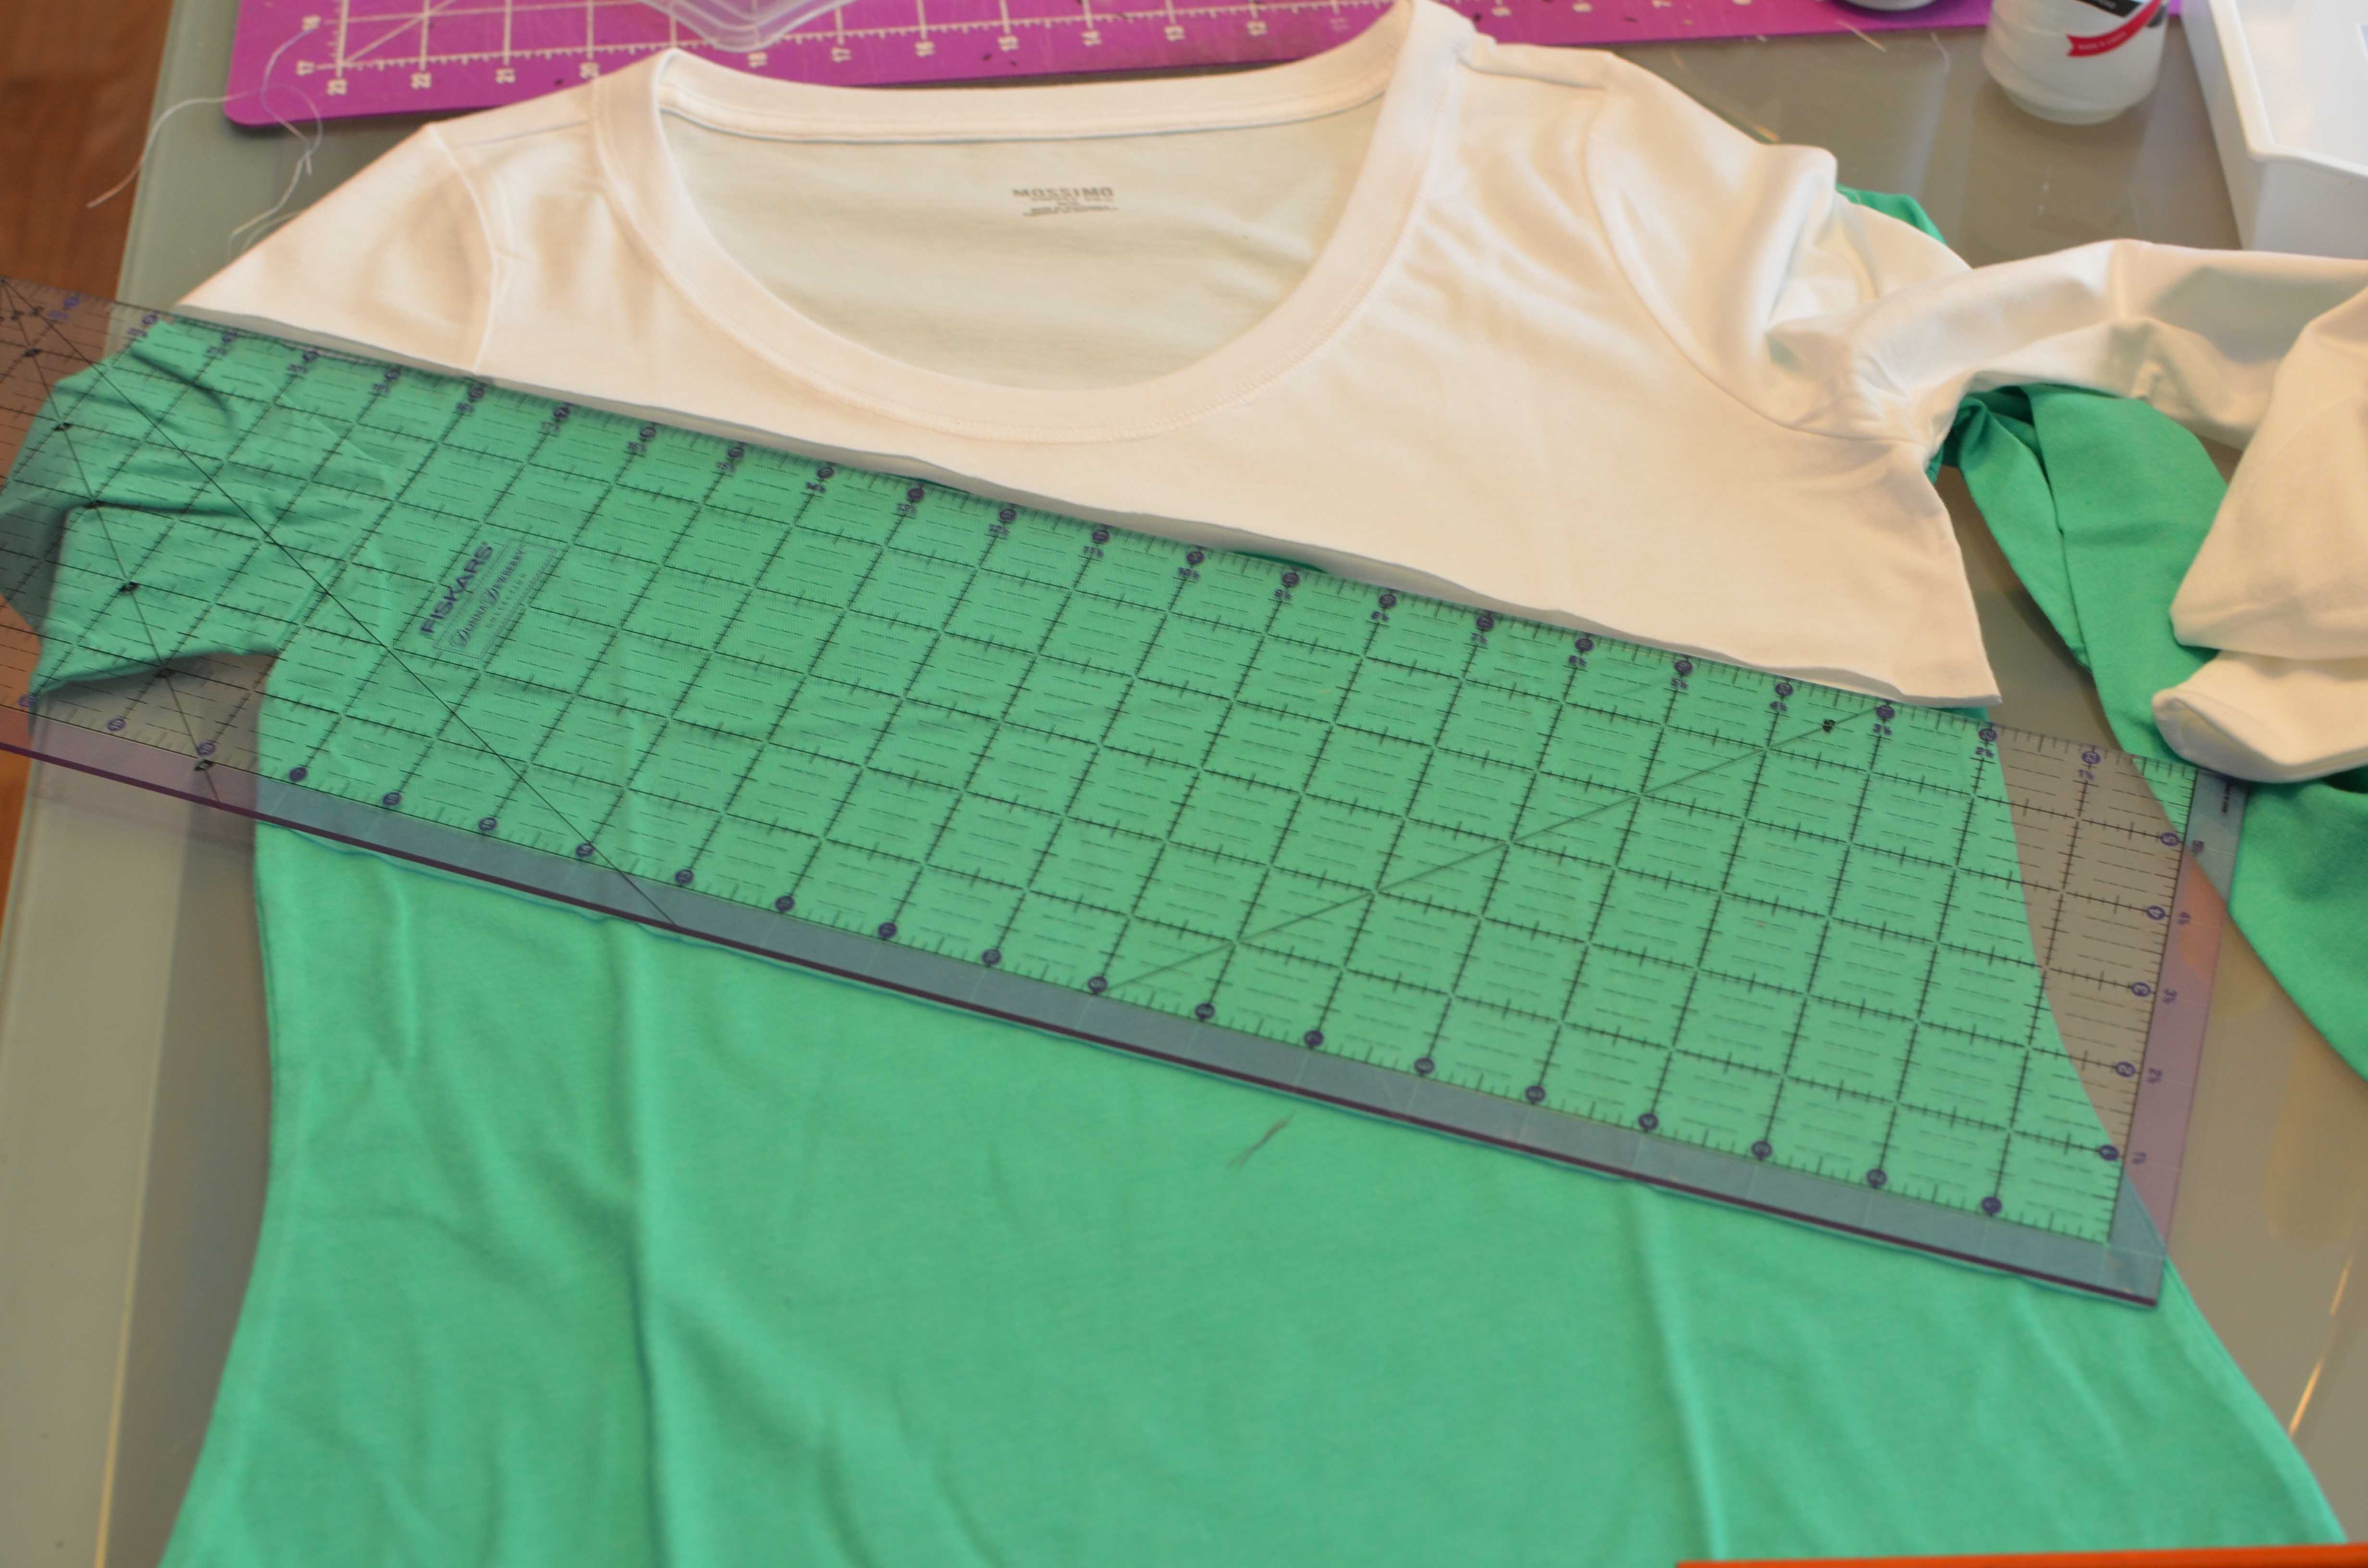
Then laid the ruler down again.
Draw the line, and then cut.
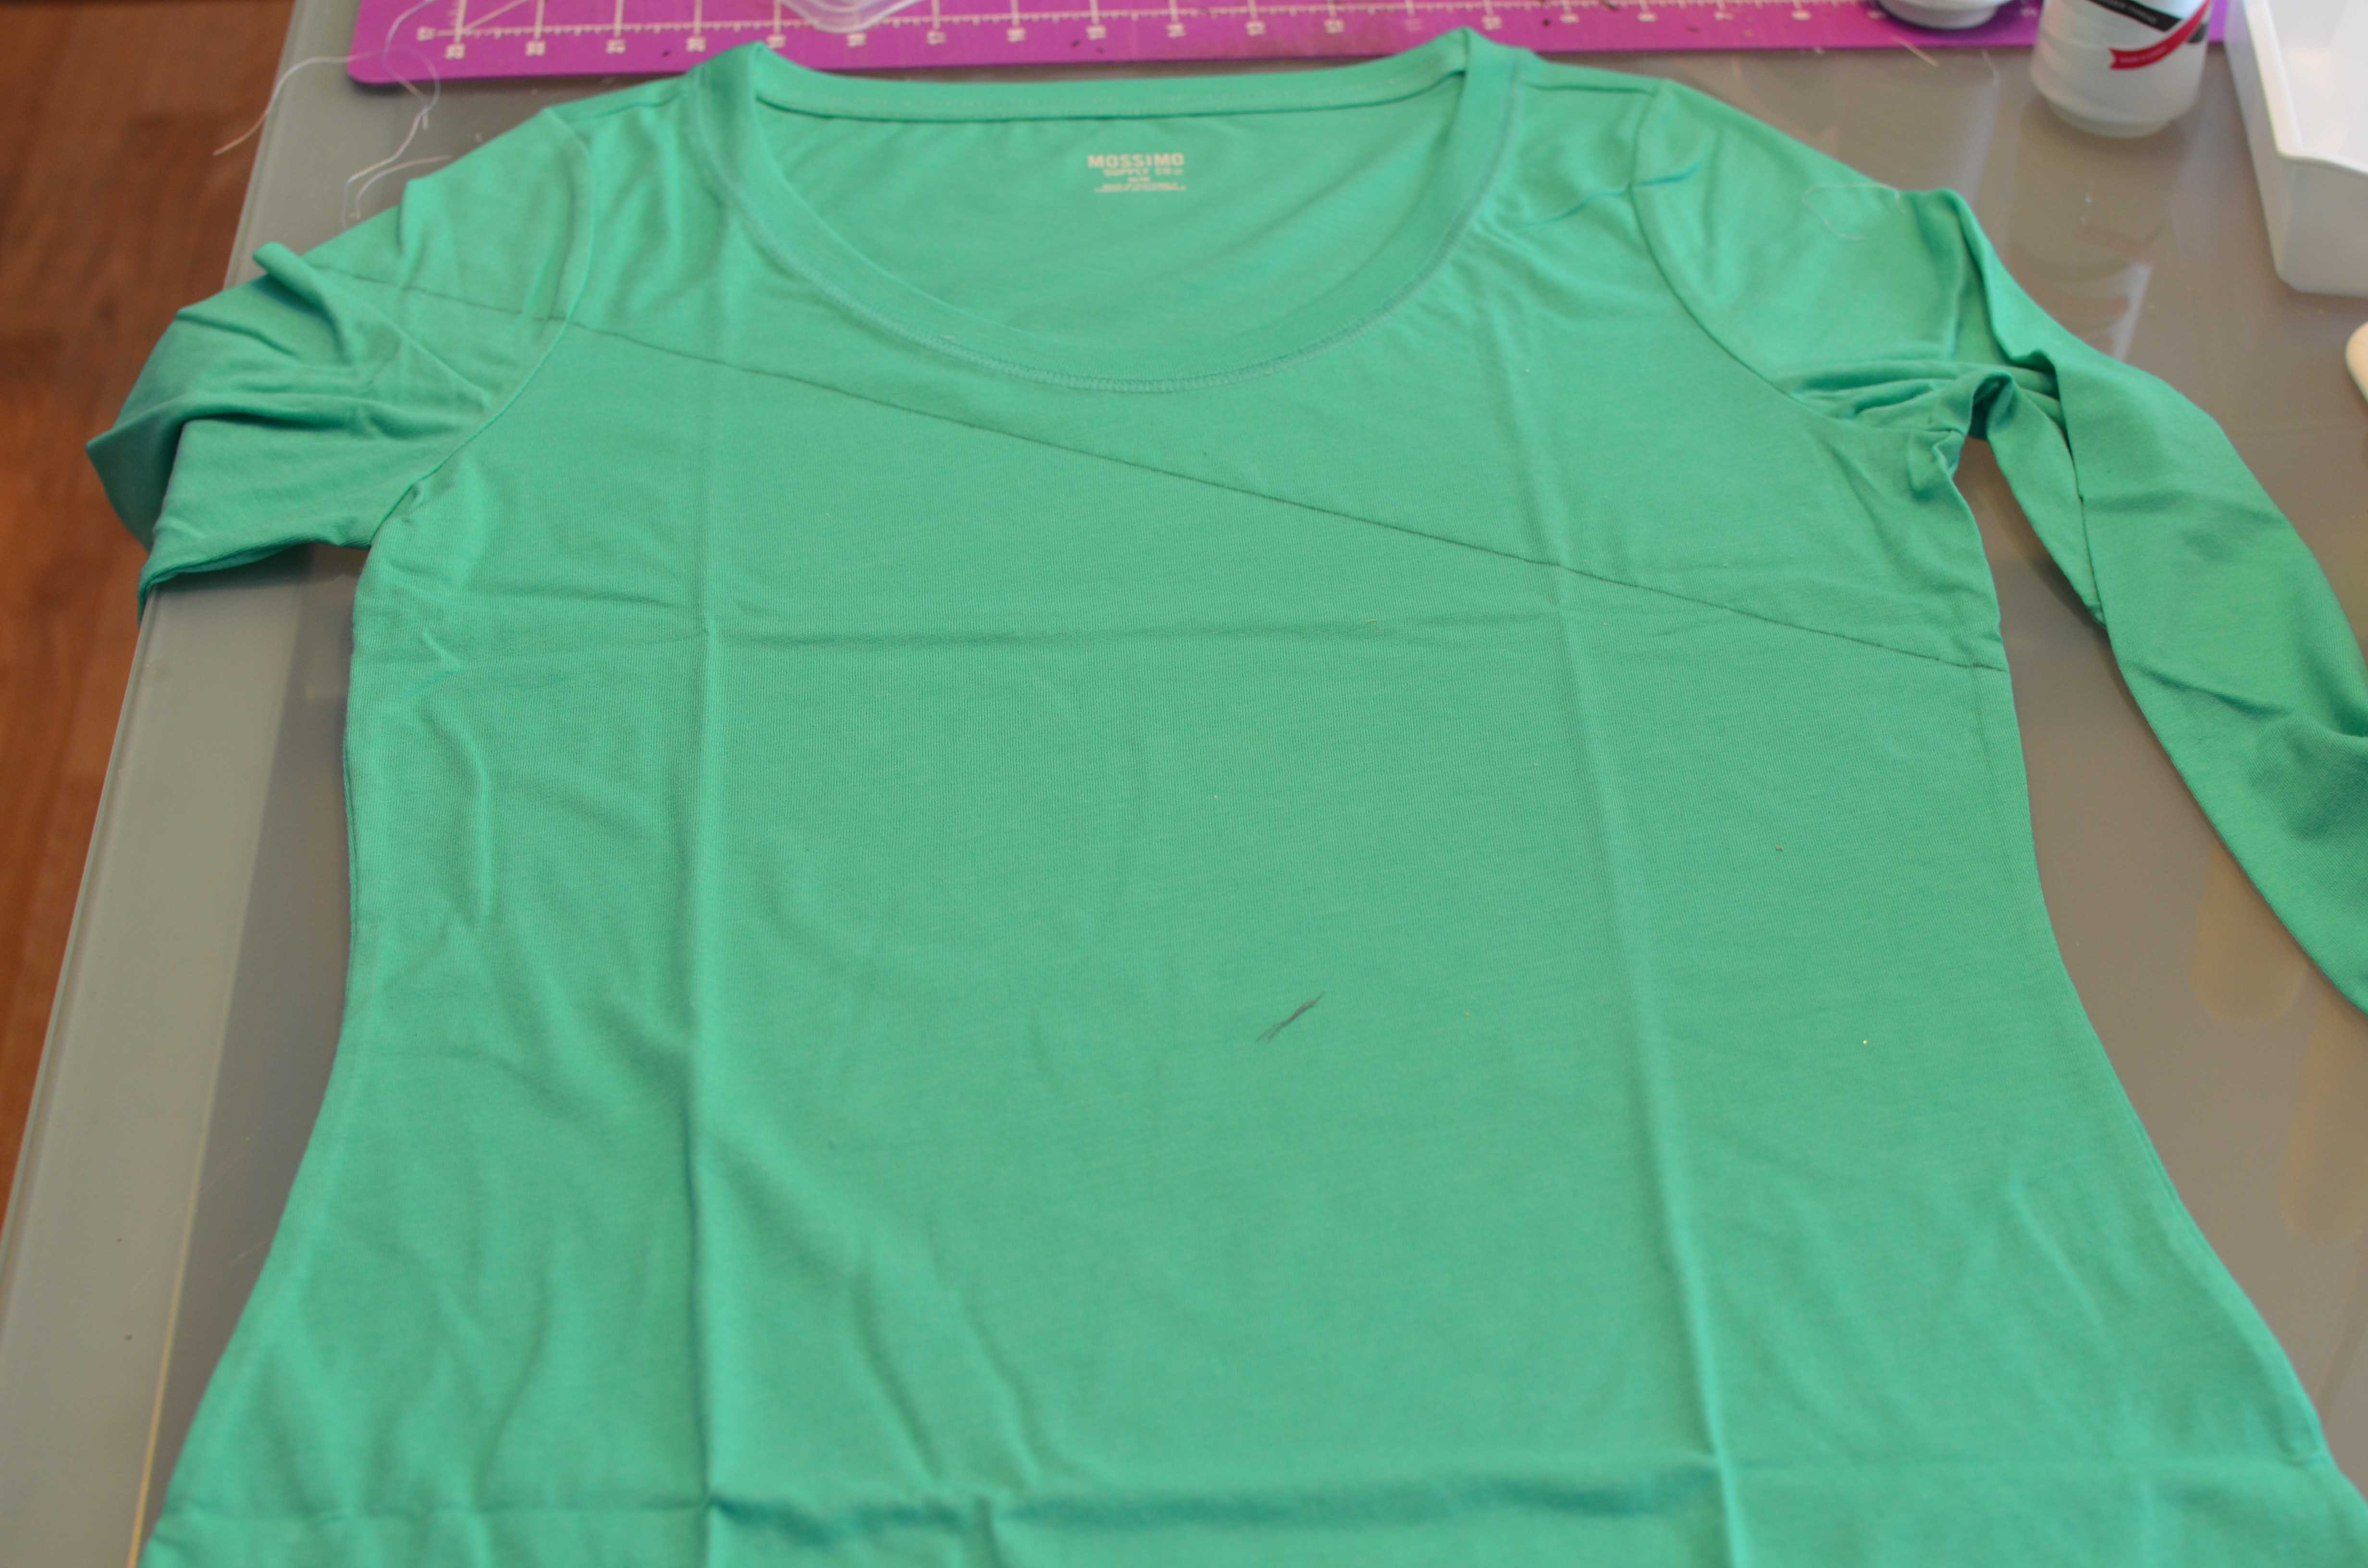
Now mix the pieces.
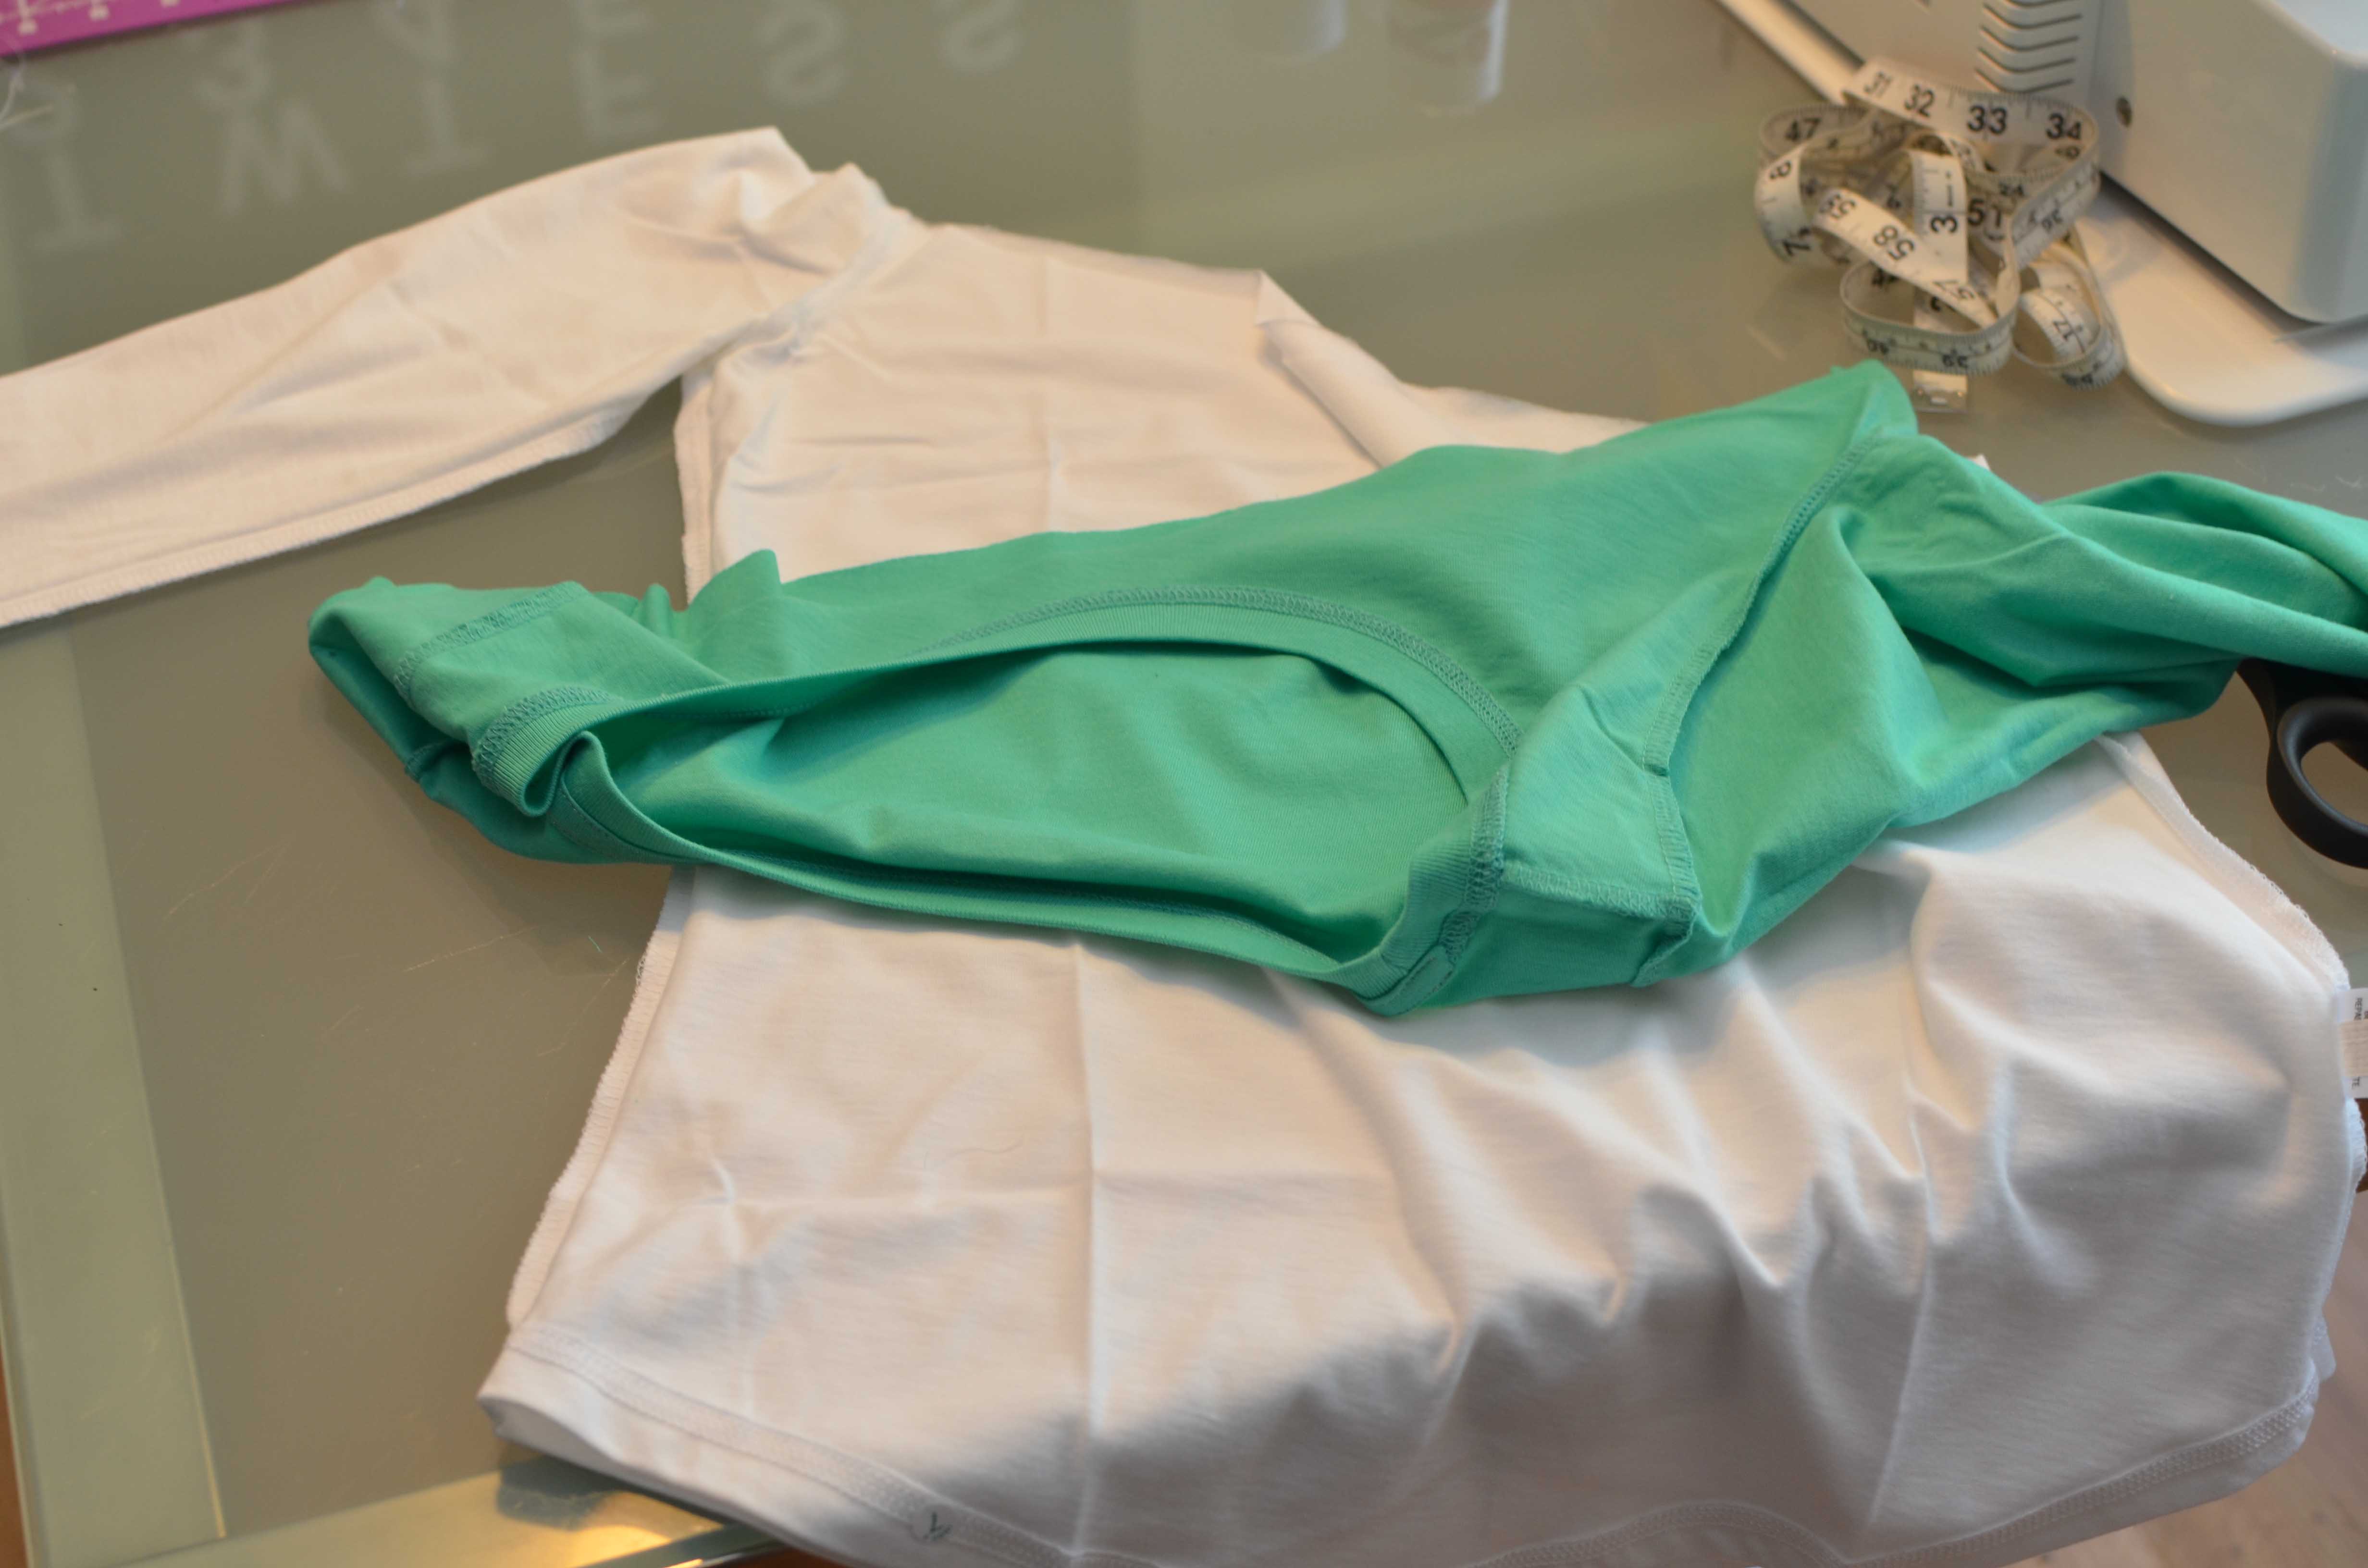
Place the top portion inside the bottom with both right sides together so the seam will show up on the inside of the shirt.
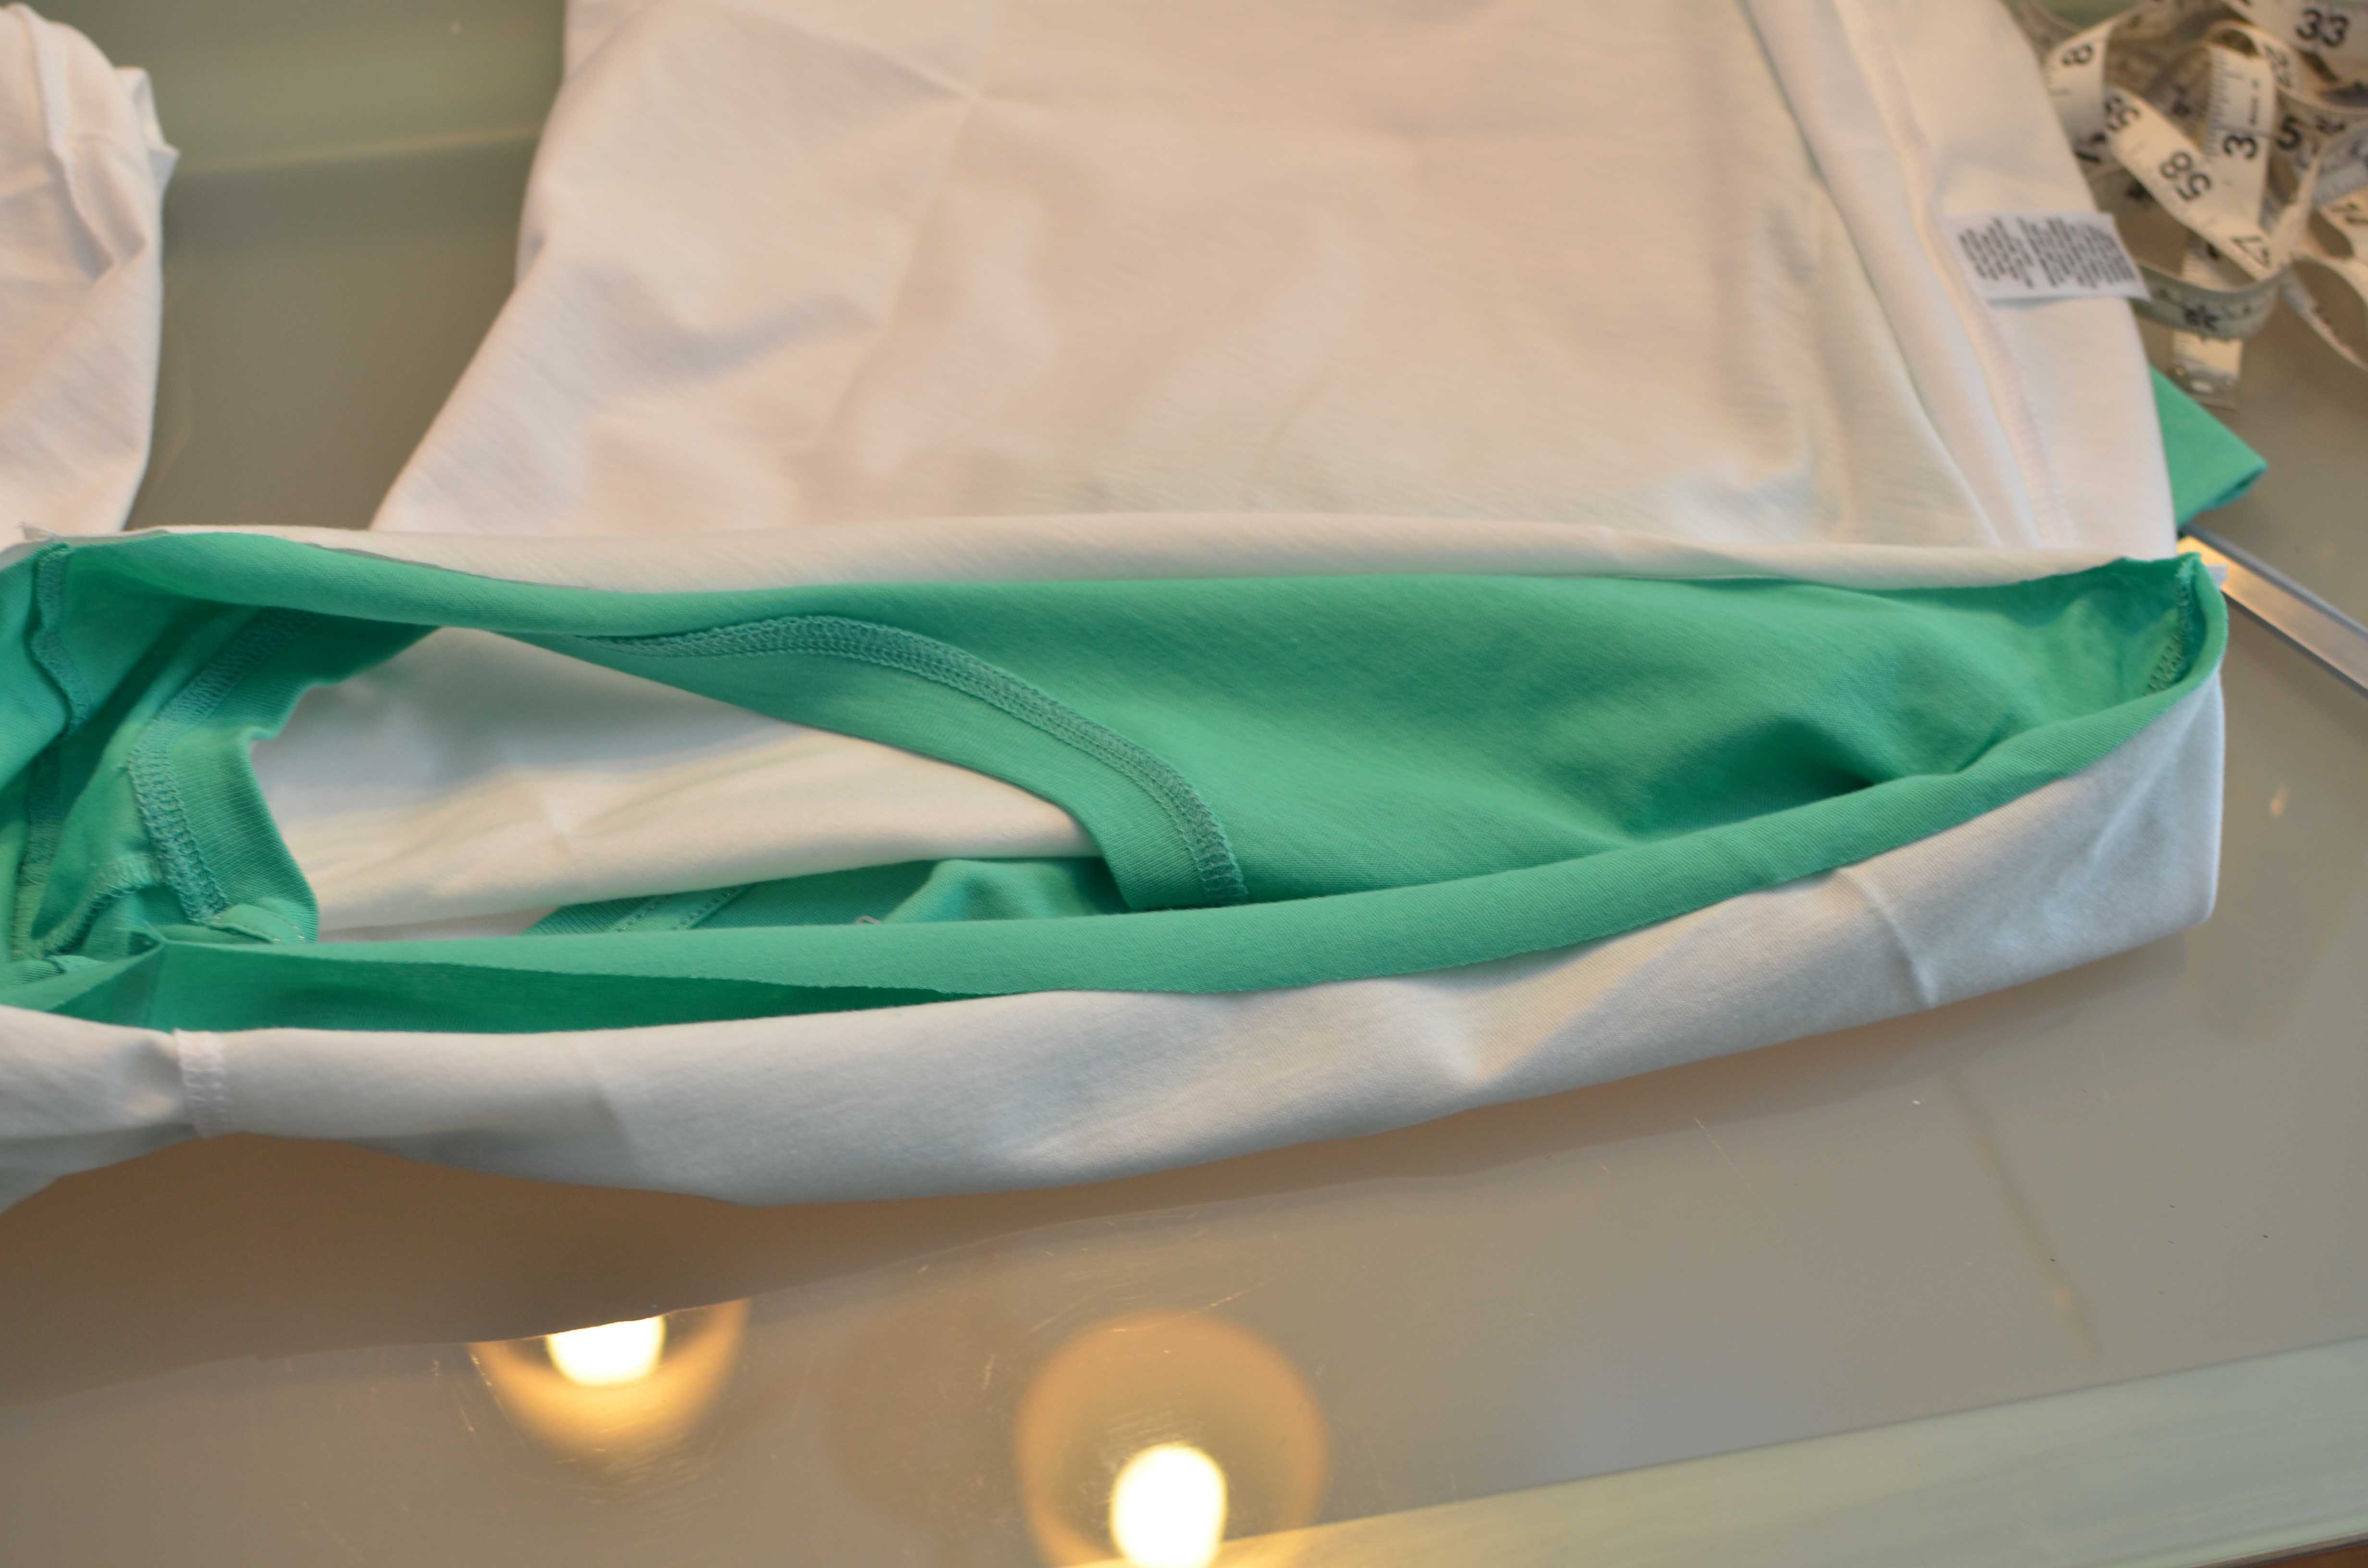
Make sure to line up the seams first.
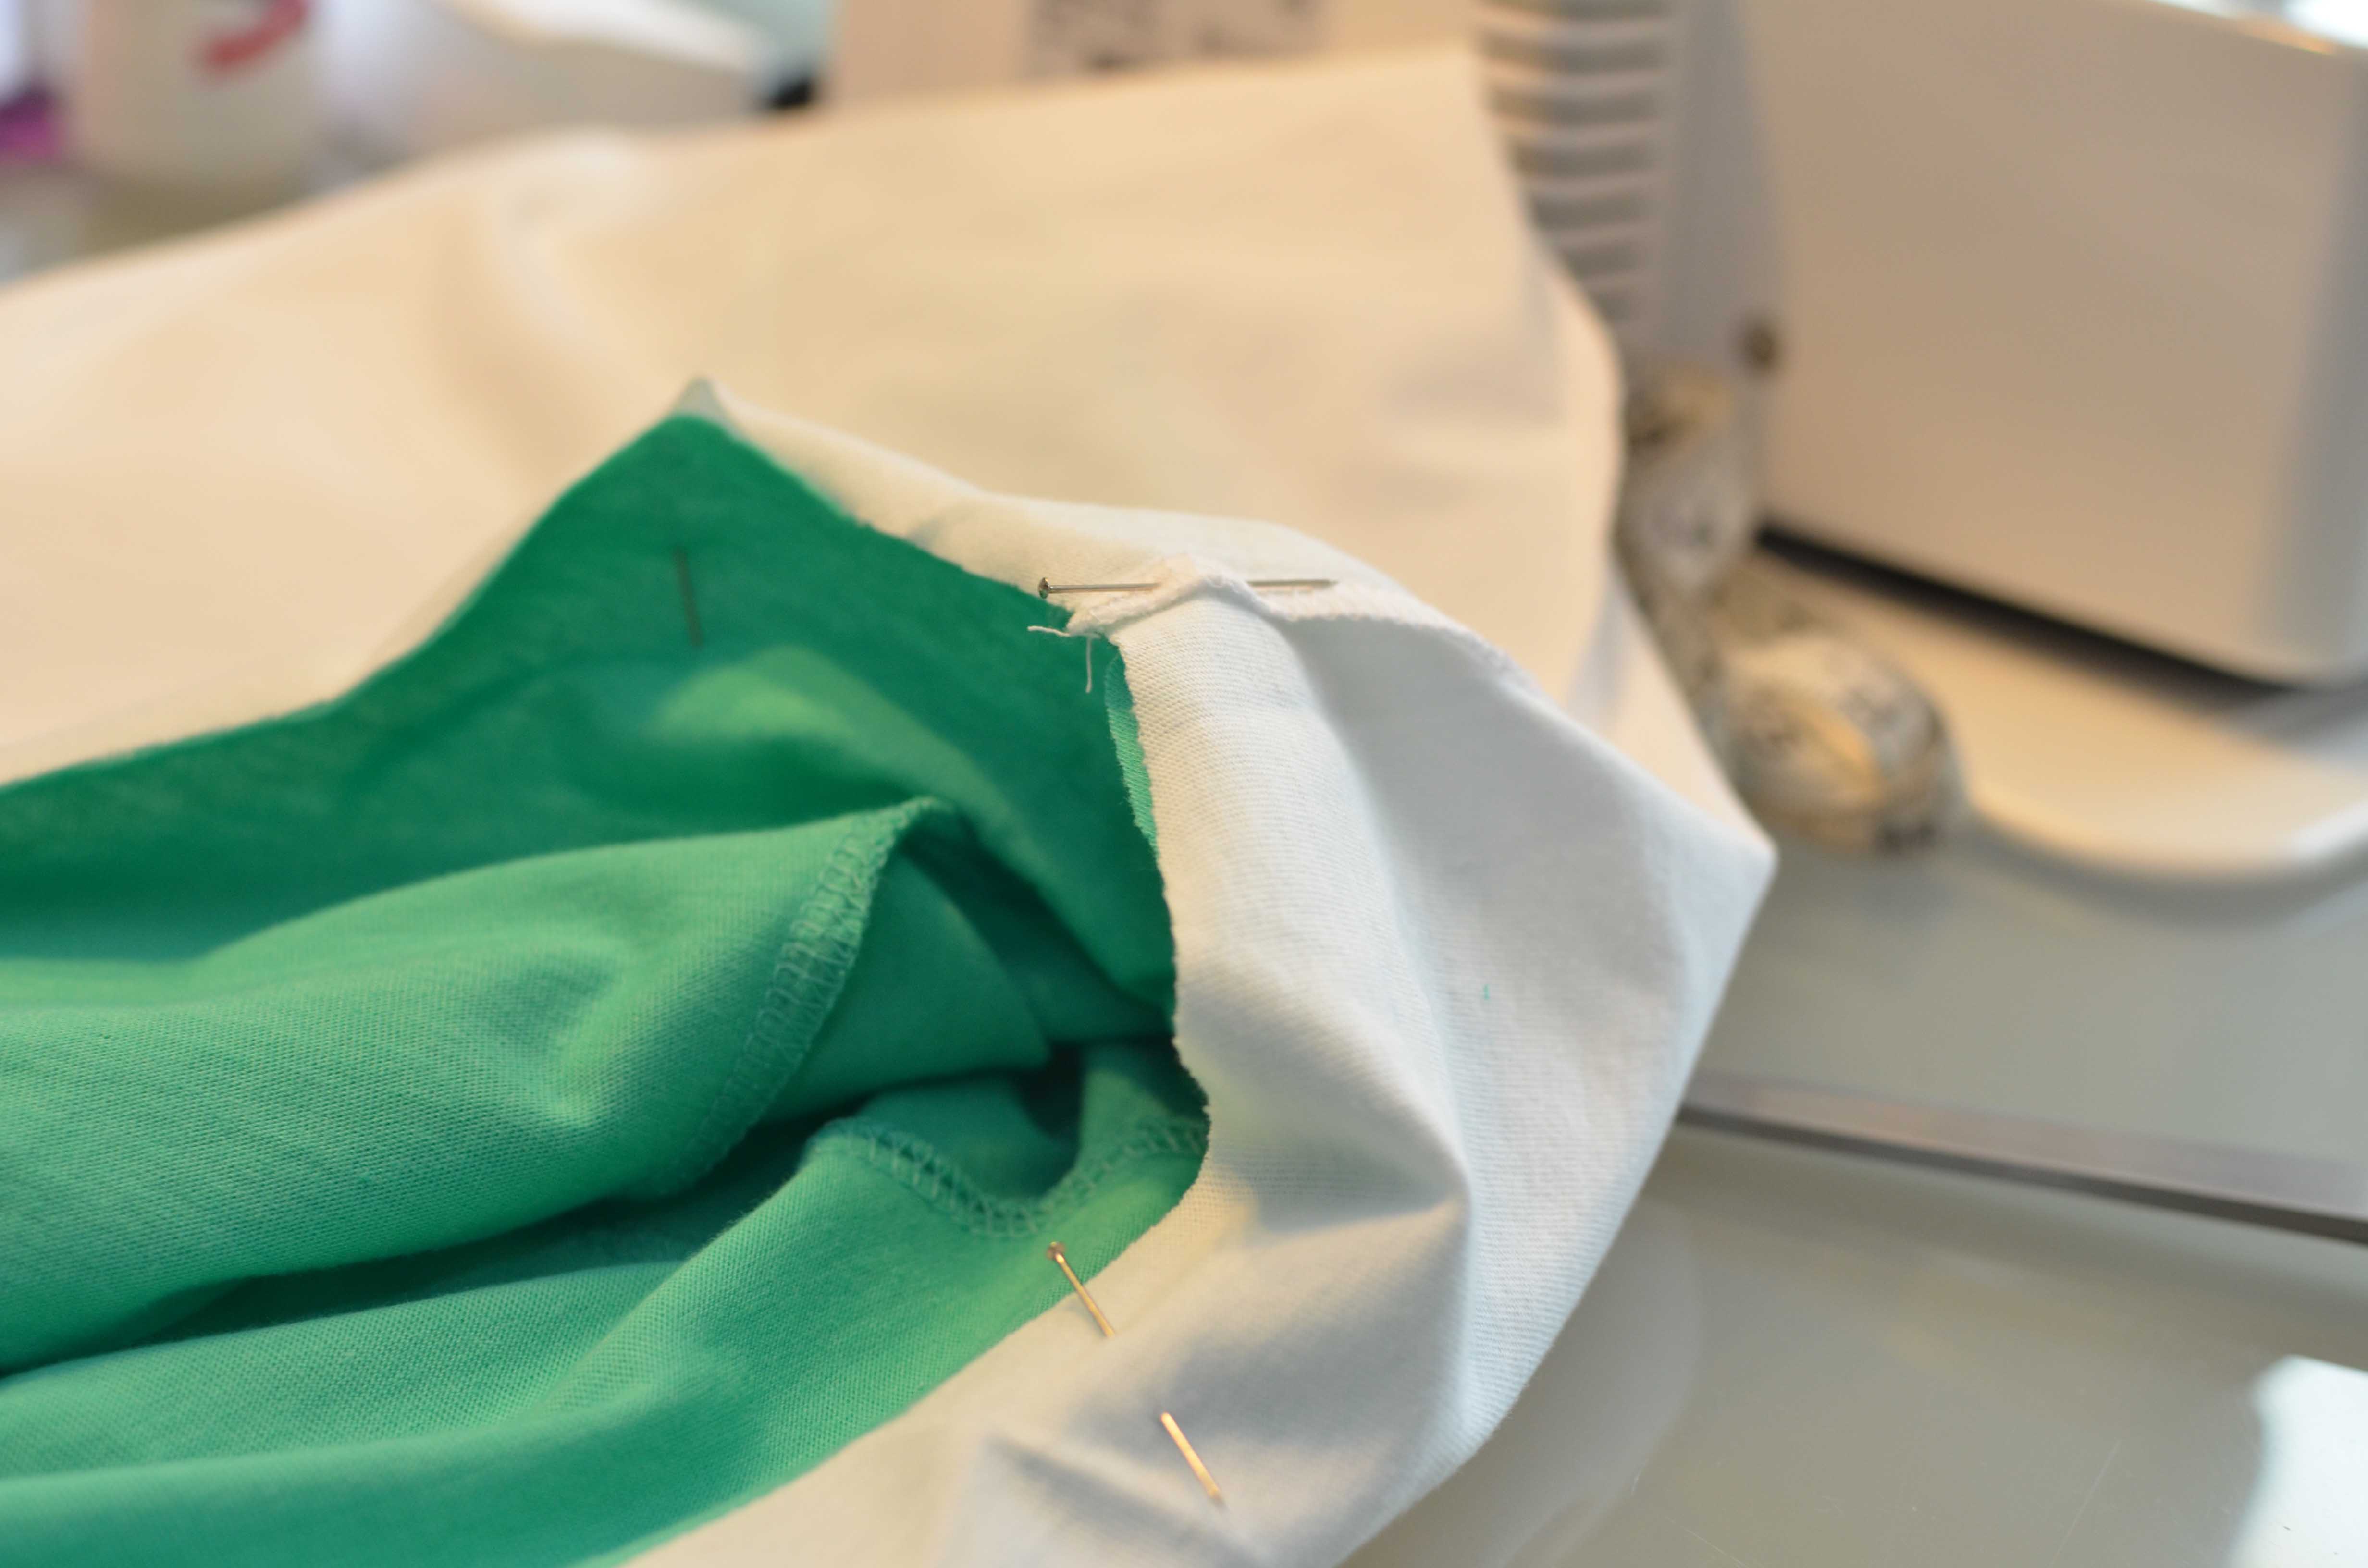
Start pinning.
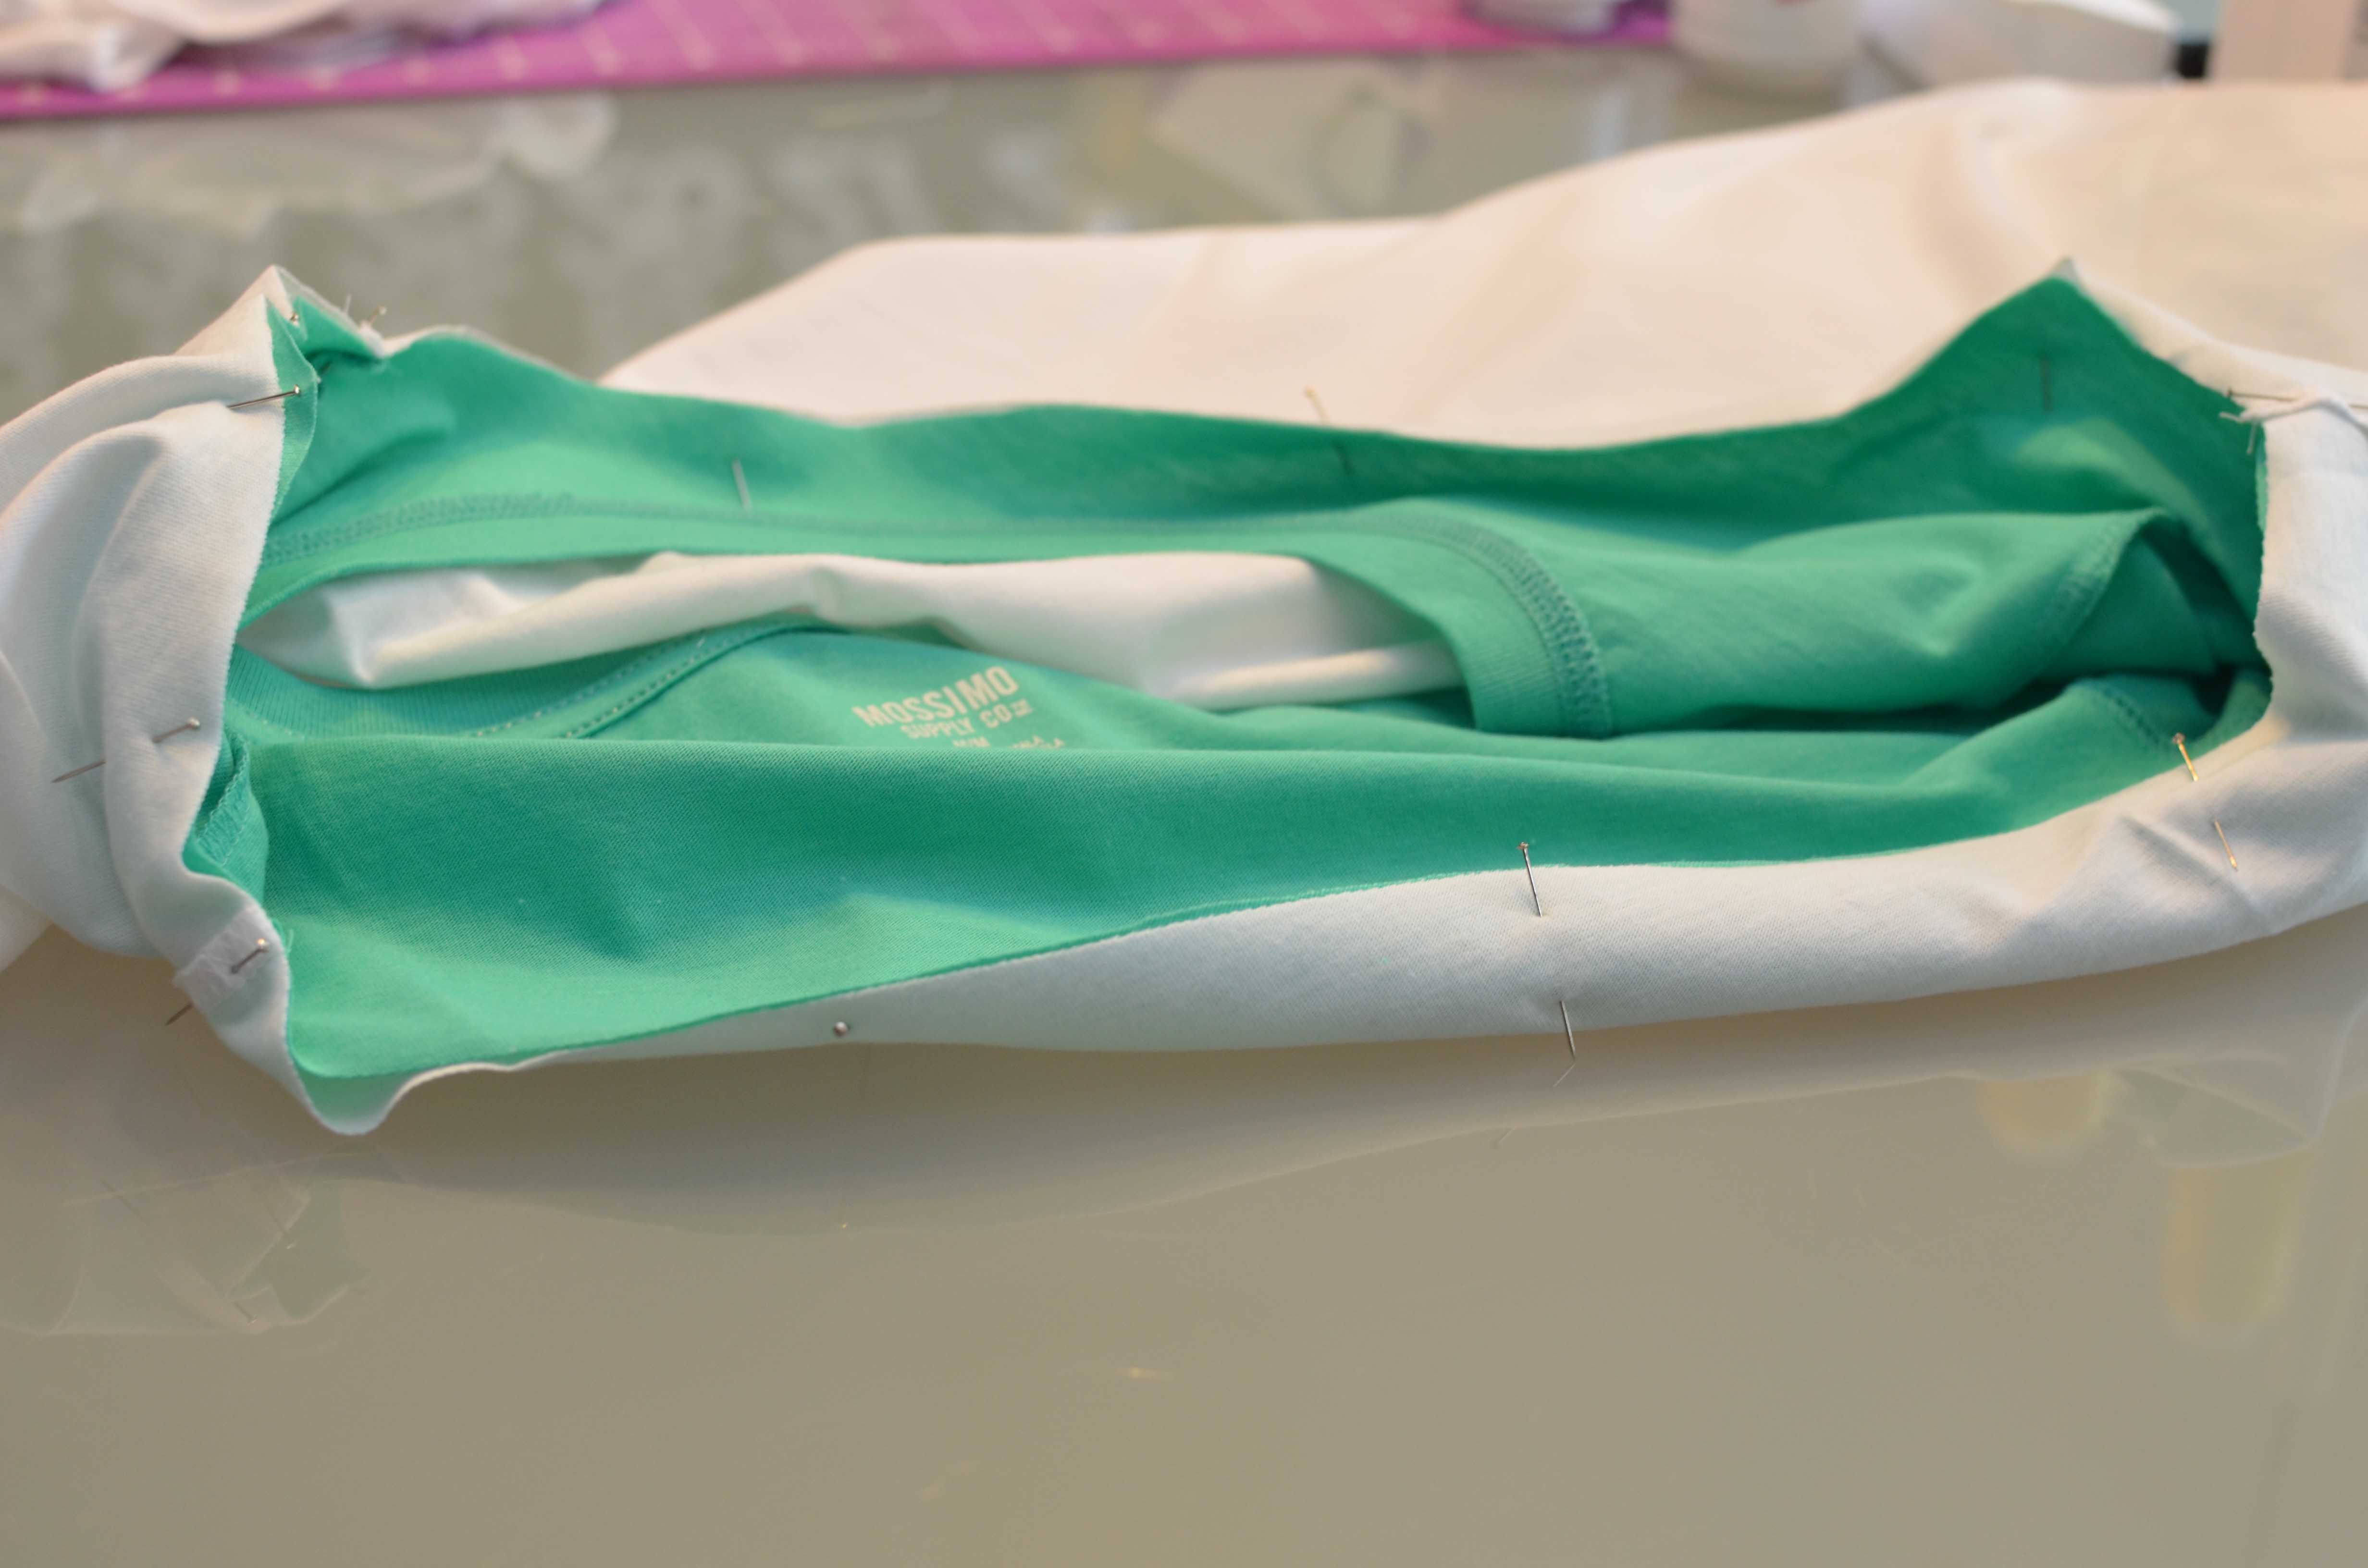
I pinned the seams and then worked my way around so there weren’t any bulges. If it isn’t lining up right no matter what you do, make sure those hit in the arm pit area so it is hidden.
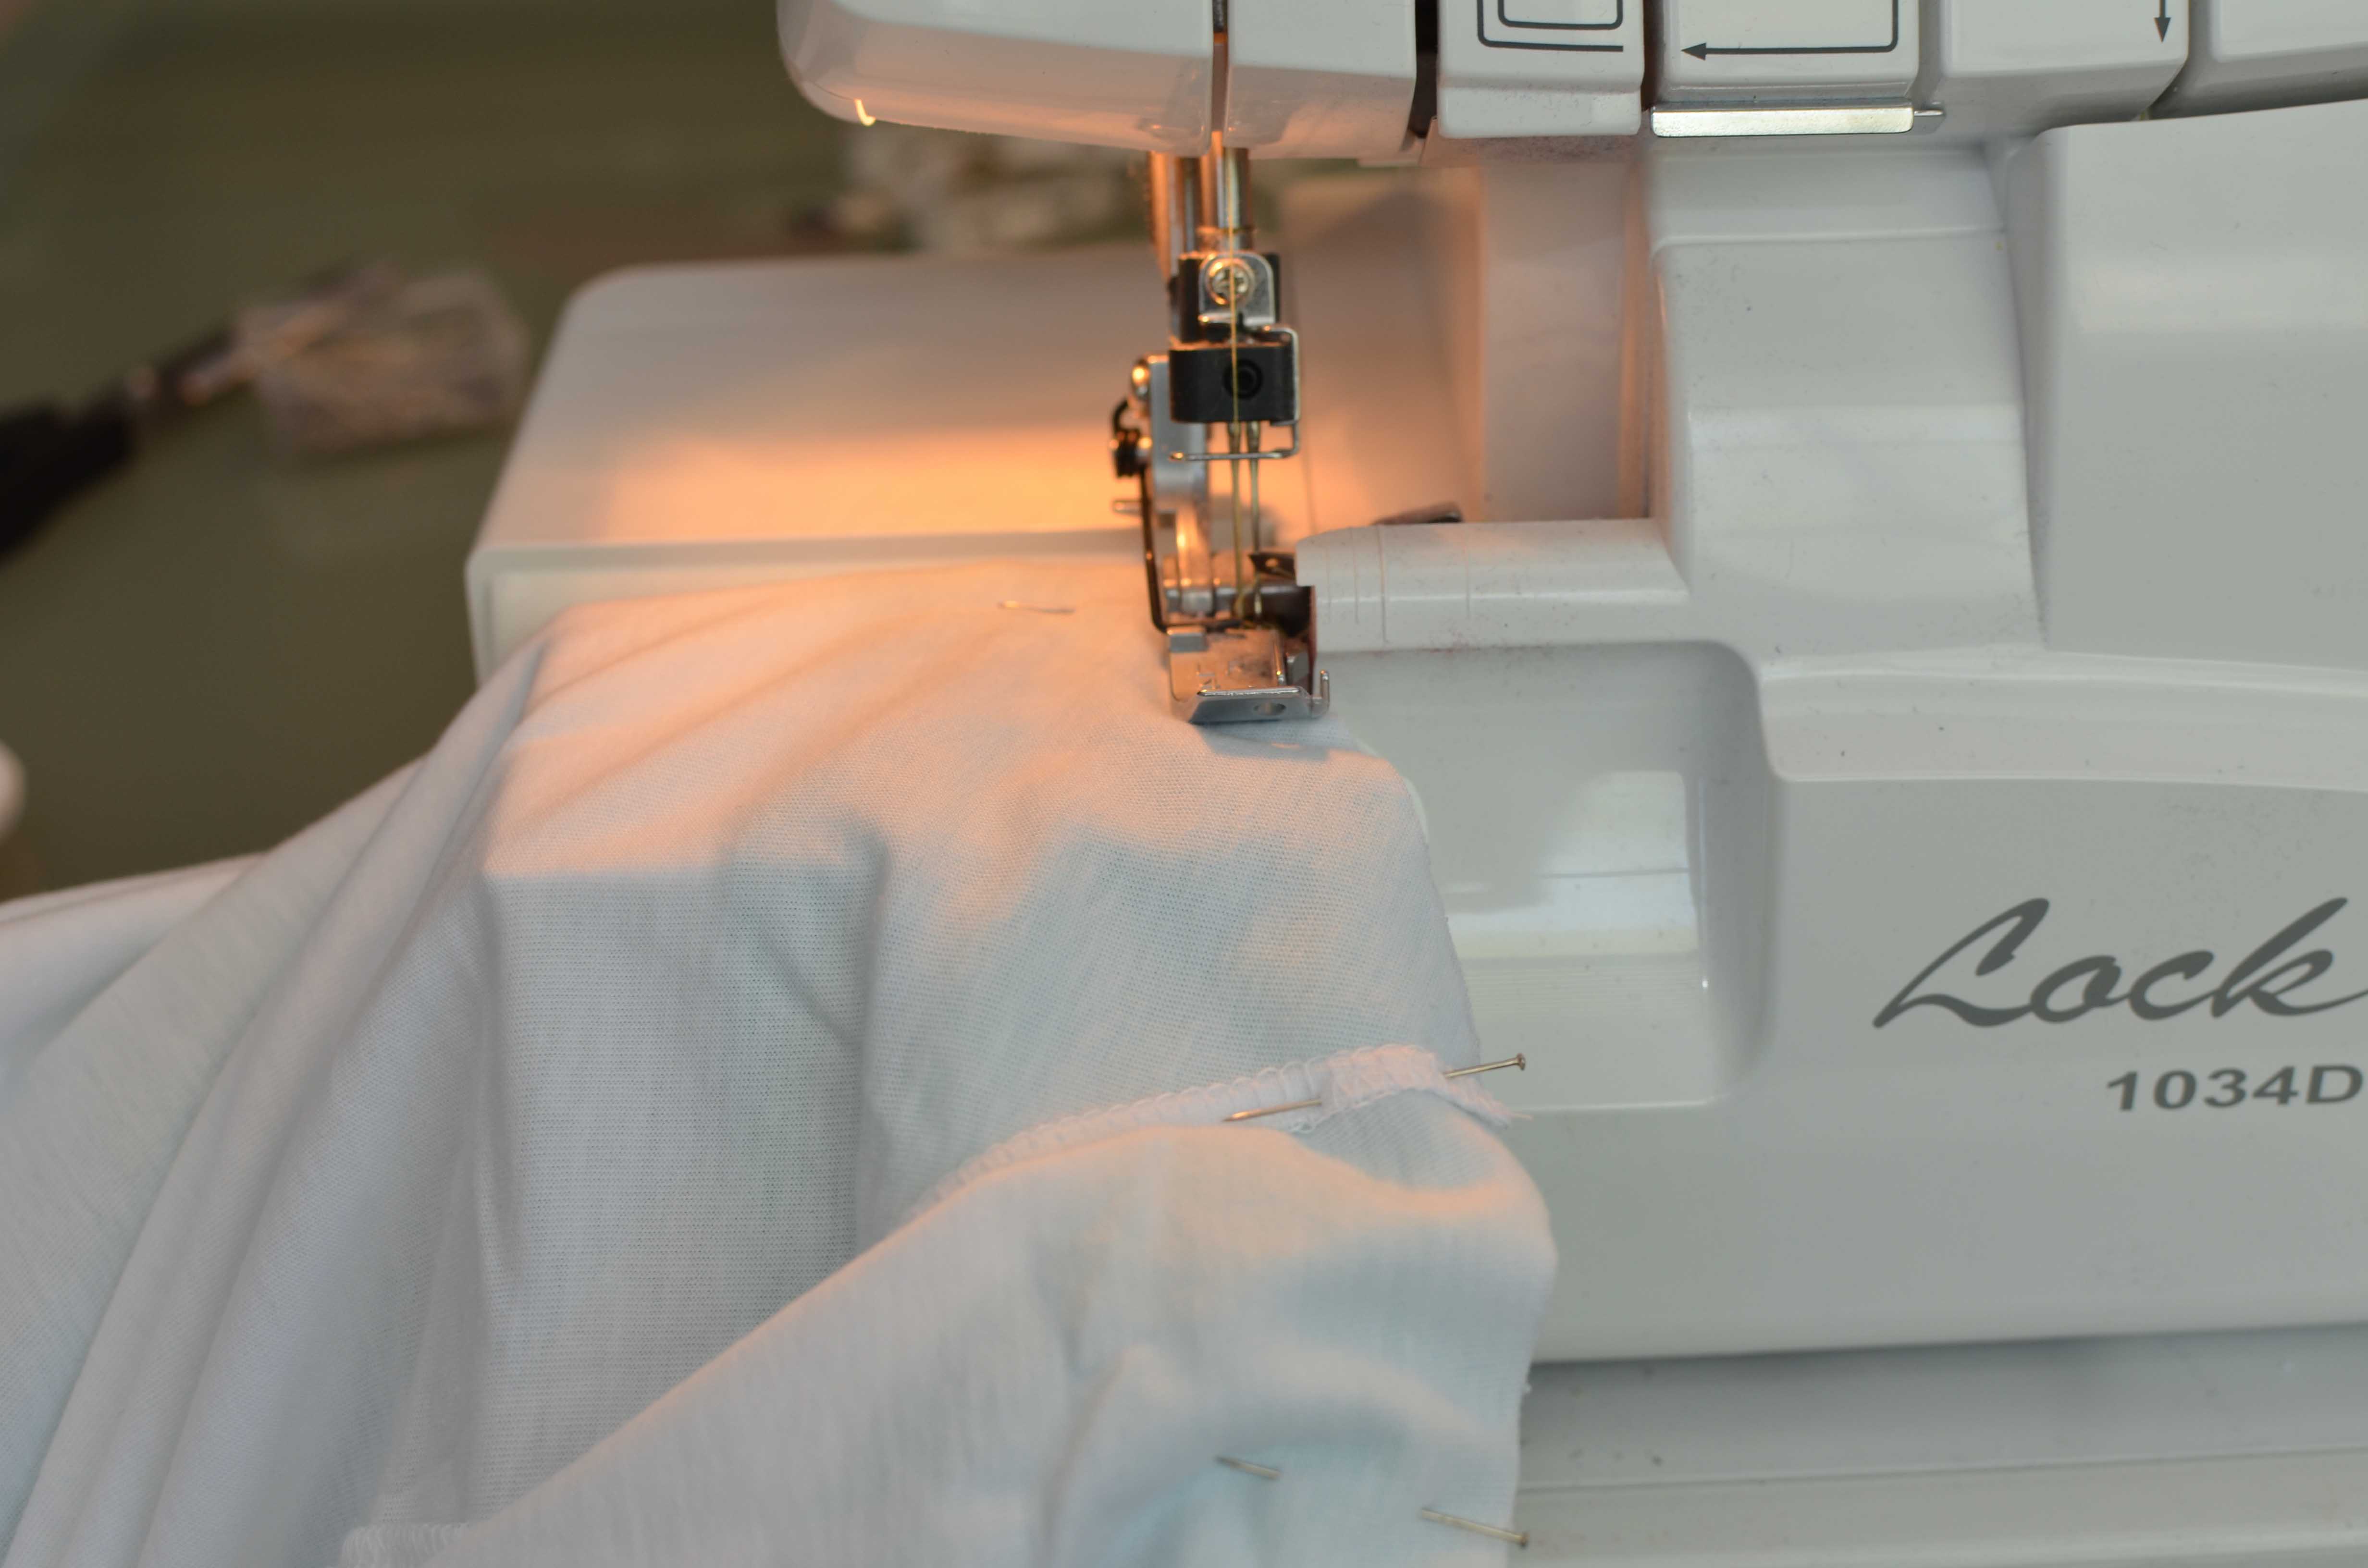
I used my serger cause that is super fast,but you could use a sewing machine to do the straight stitch first and then the zigzag as close to the edge as possible to keep everything from fraying.

Here you can see it sewn all the way around.

Turn right side out, and there you have it!

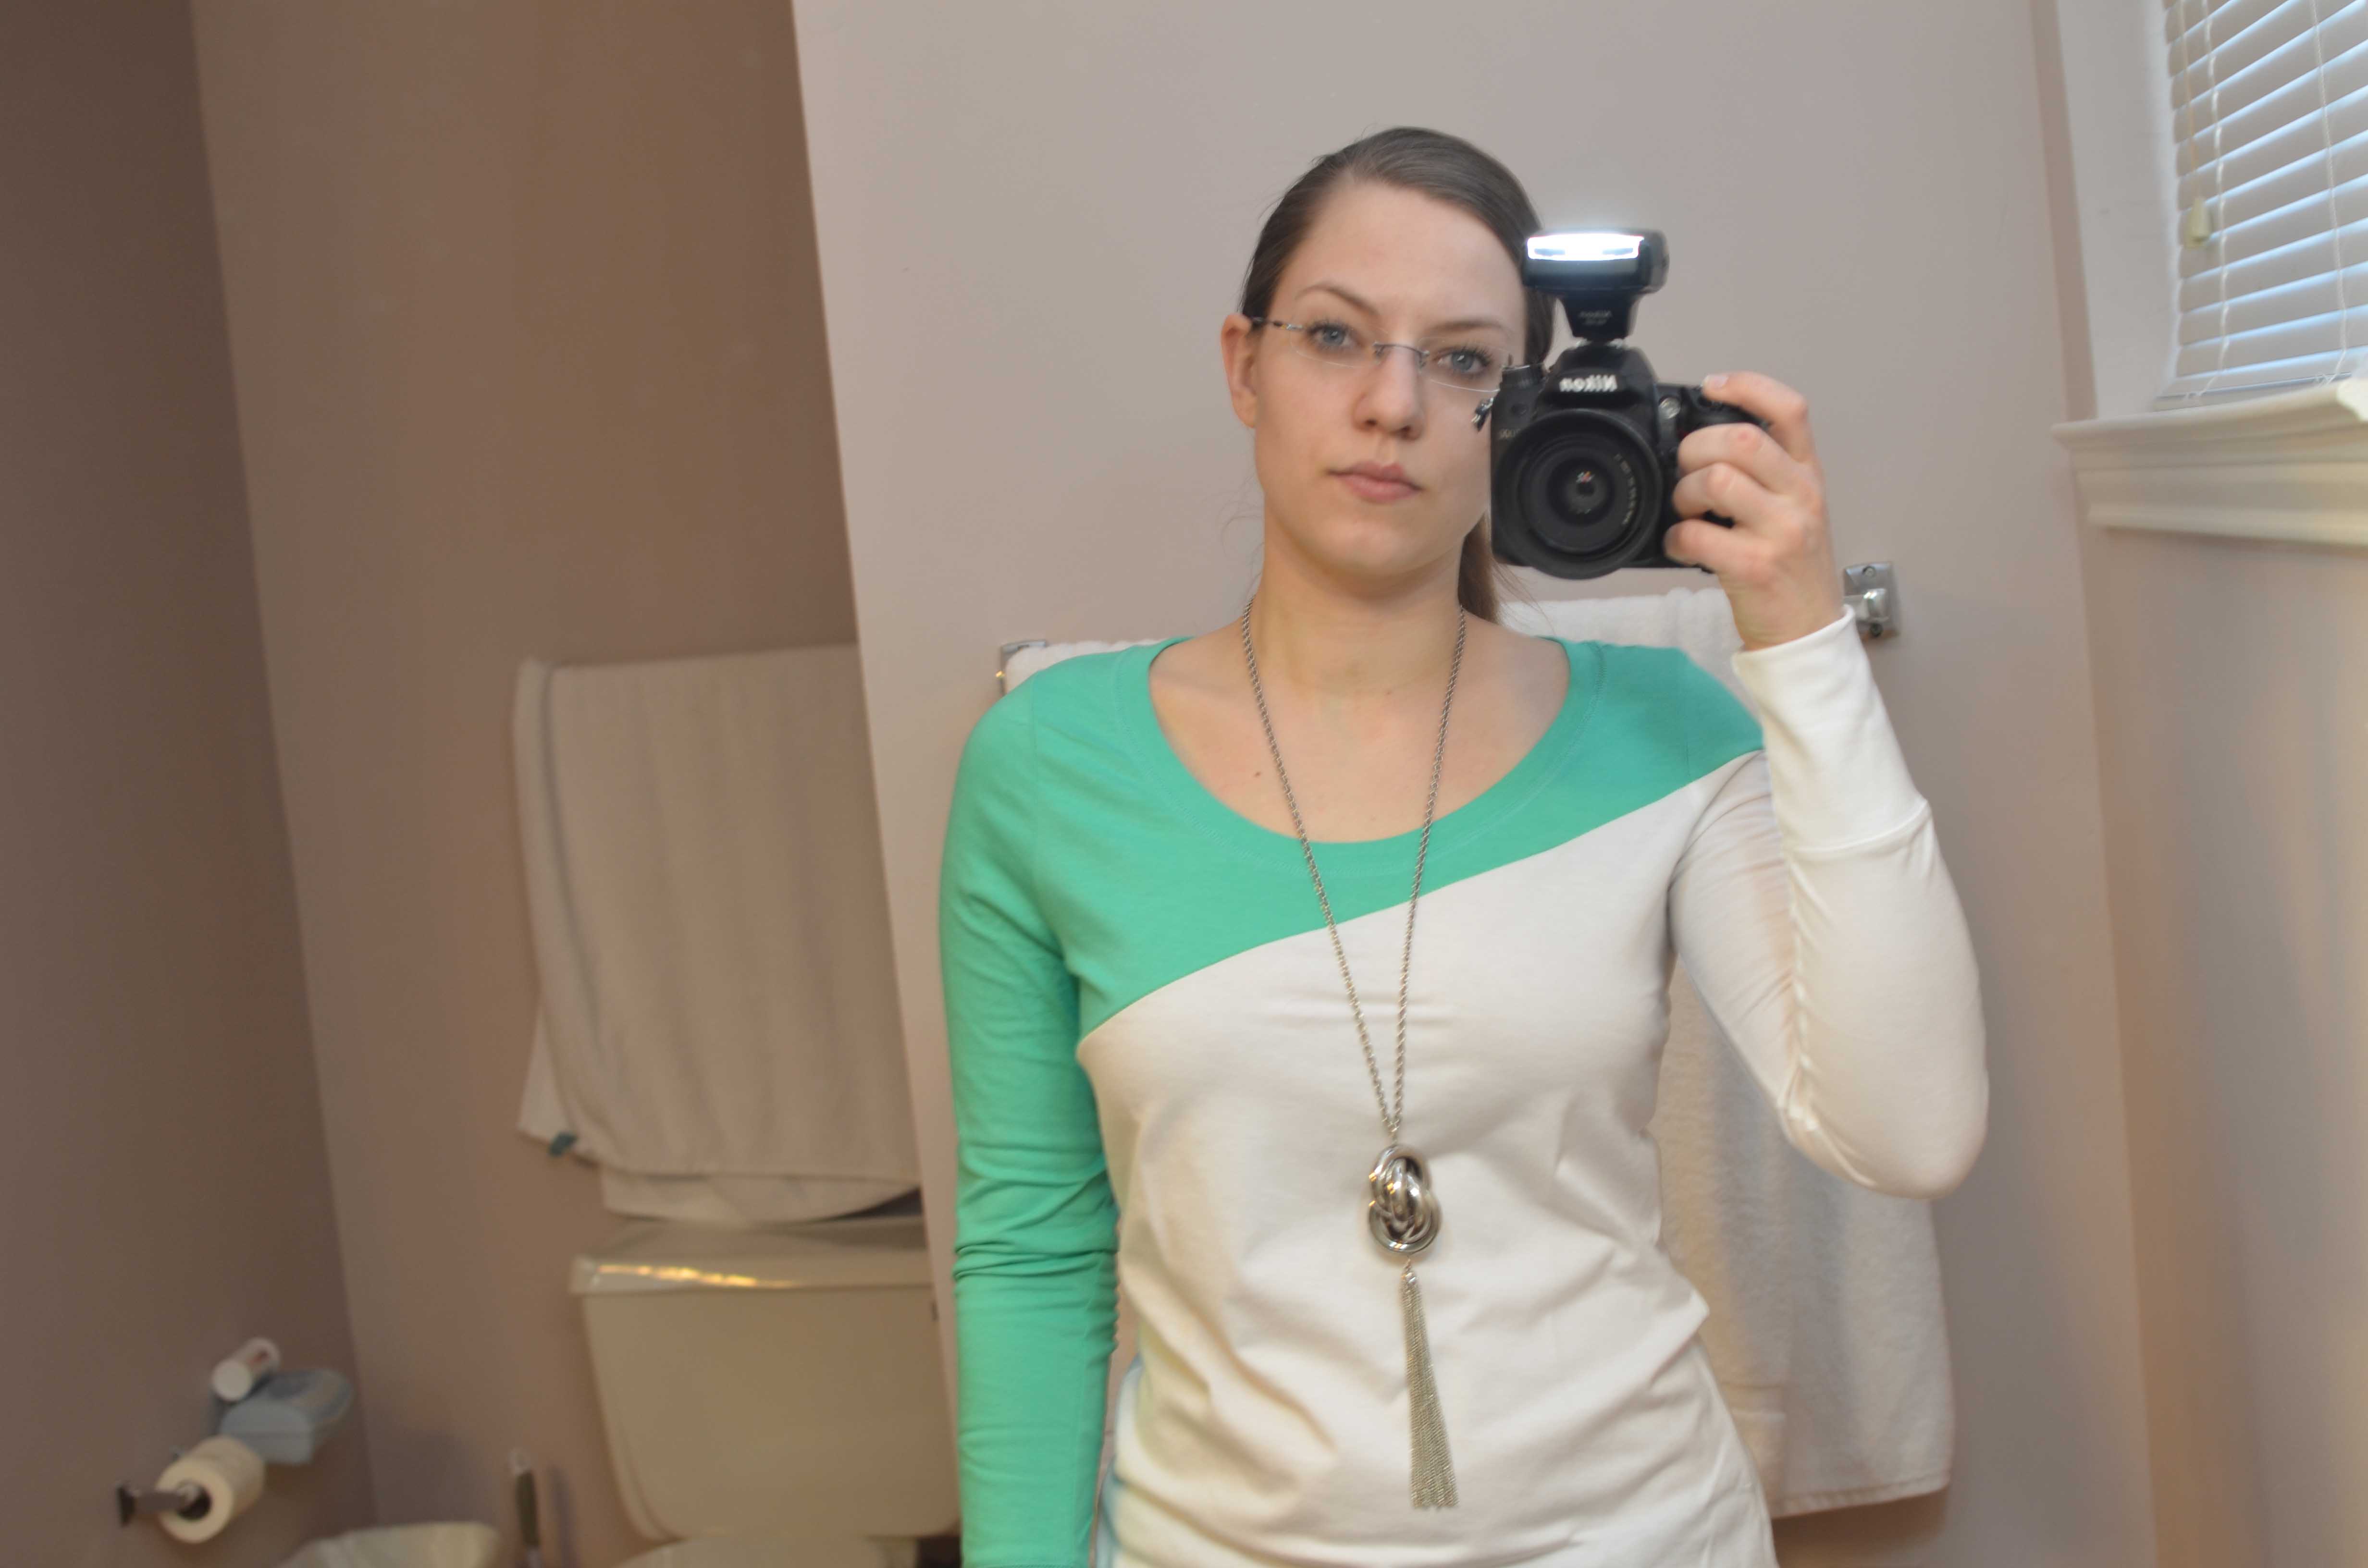
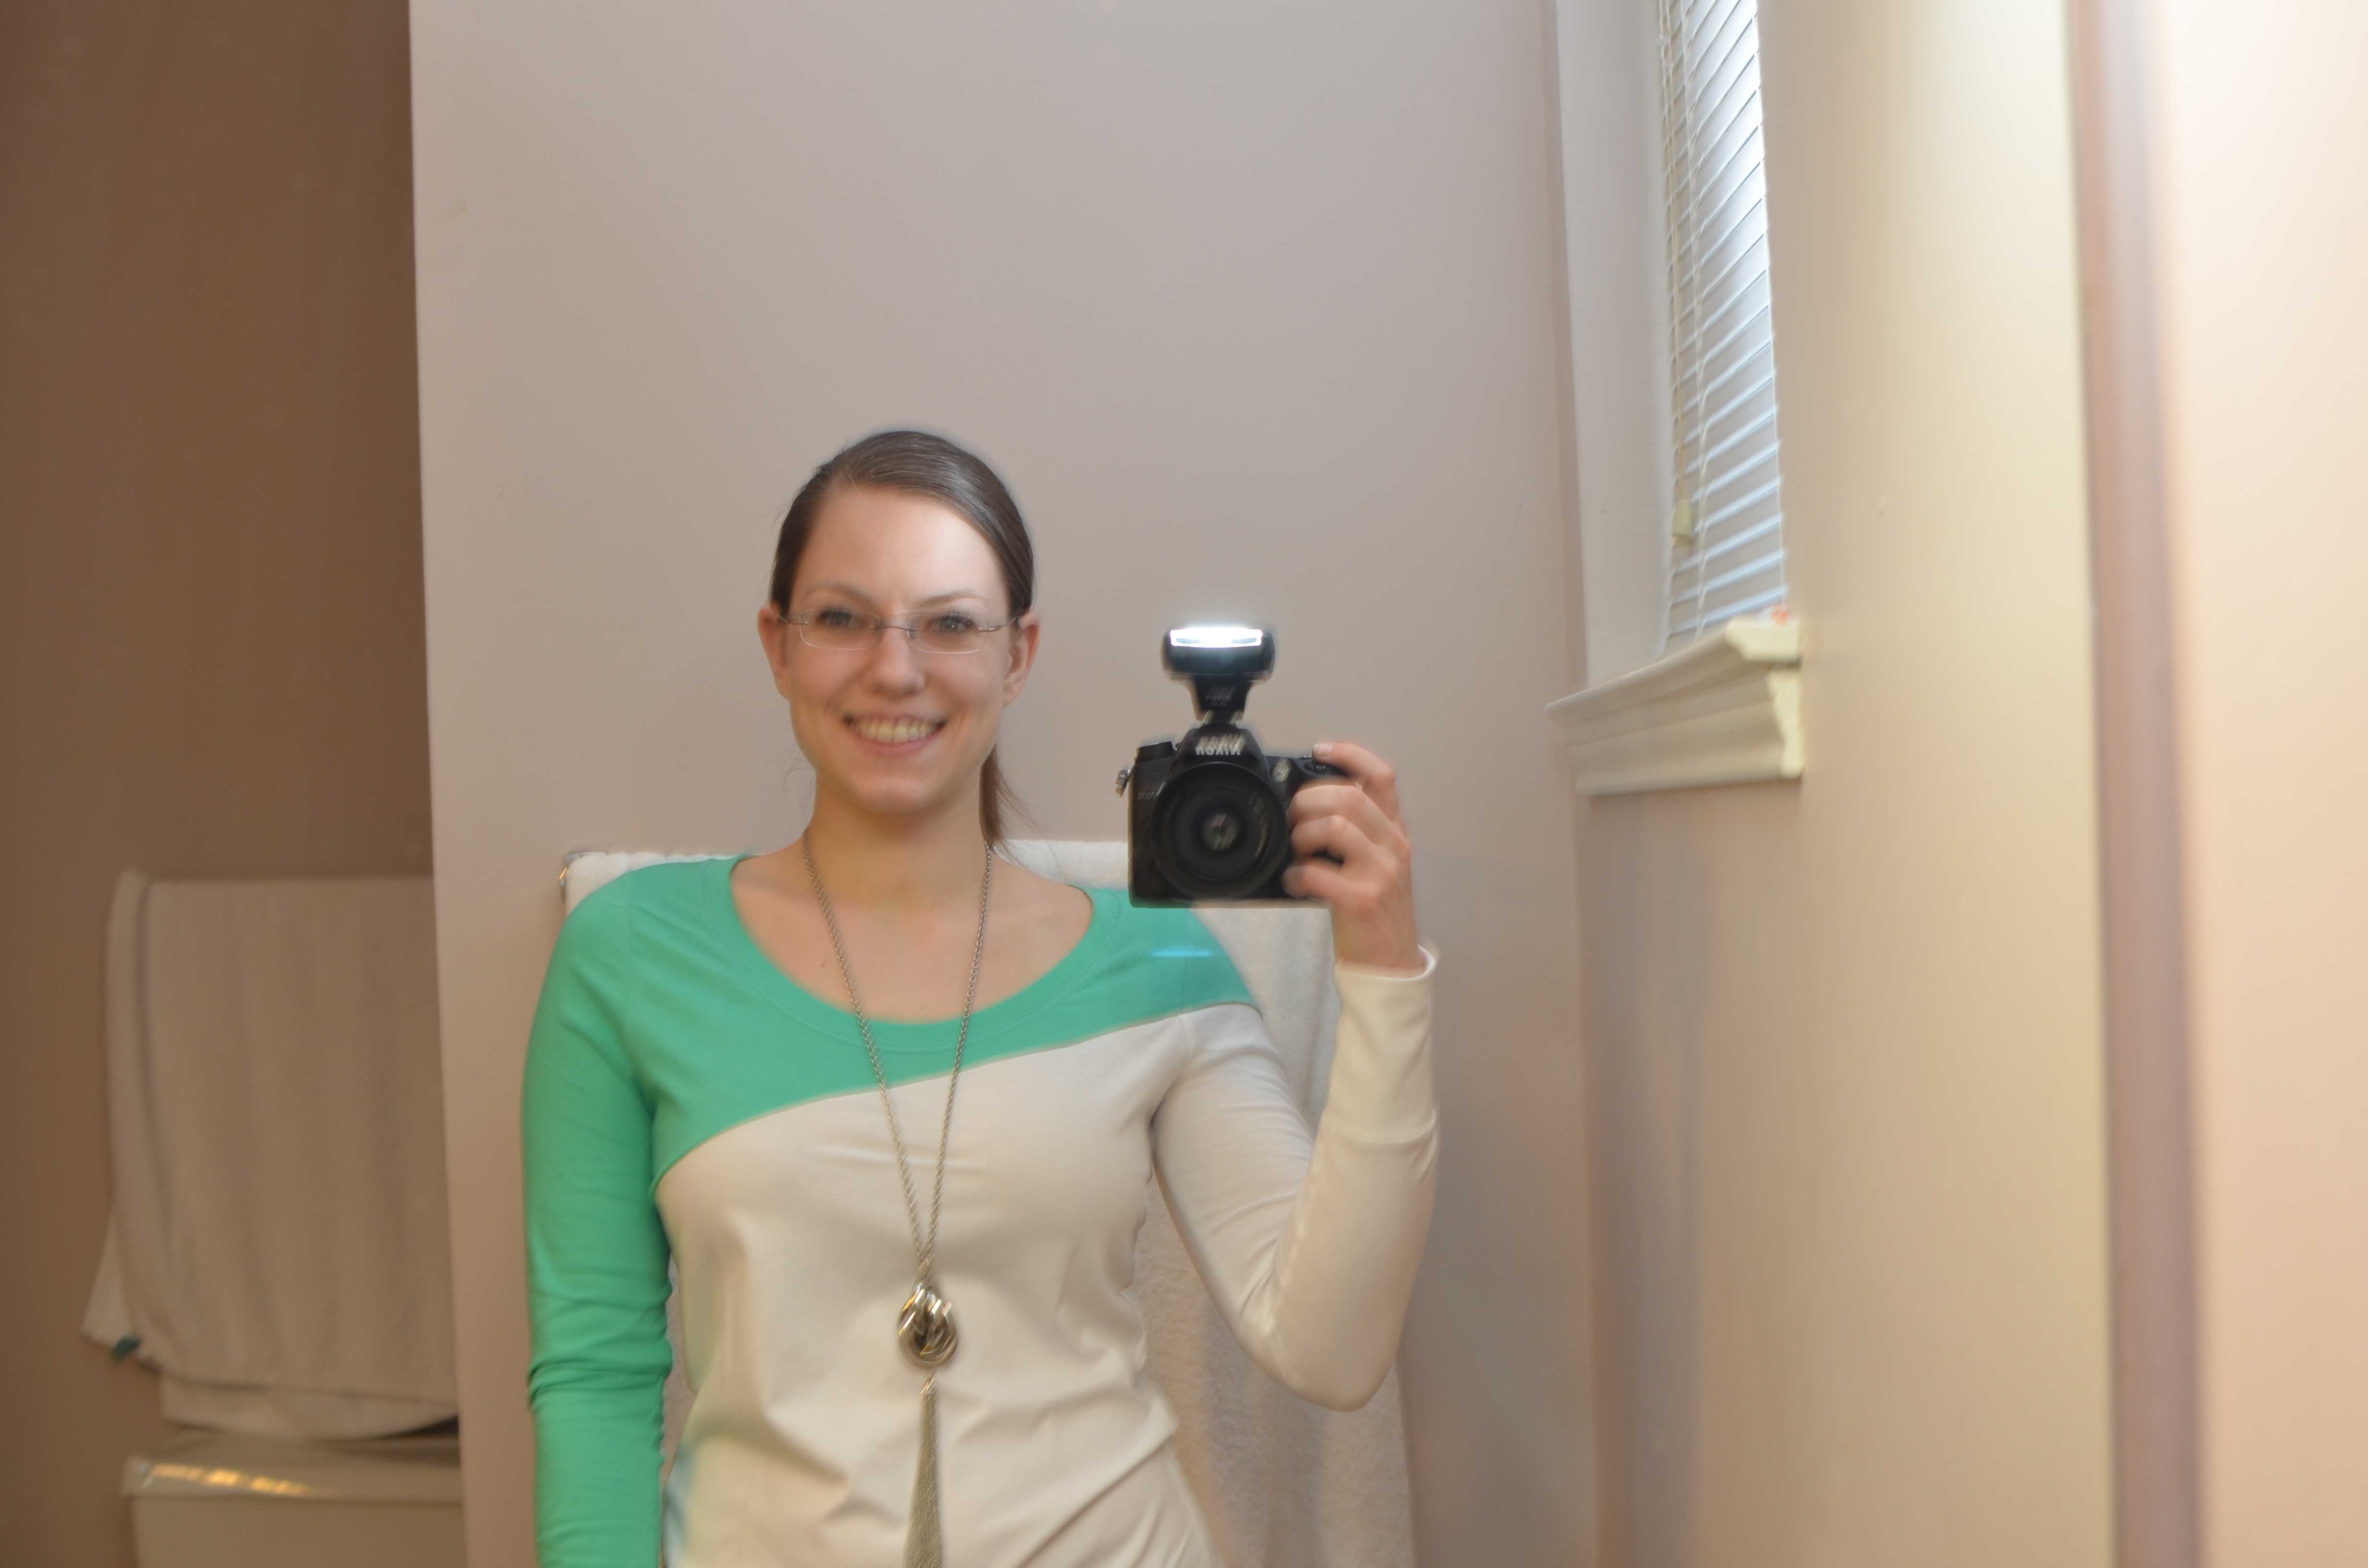
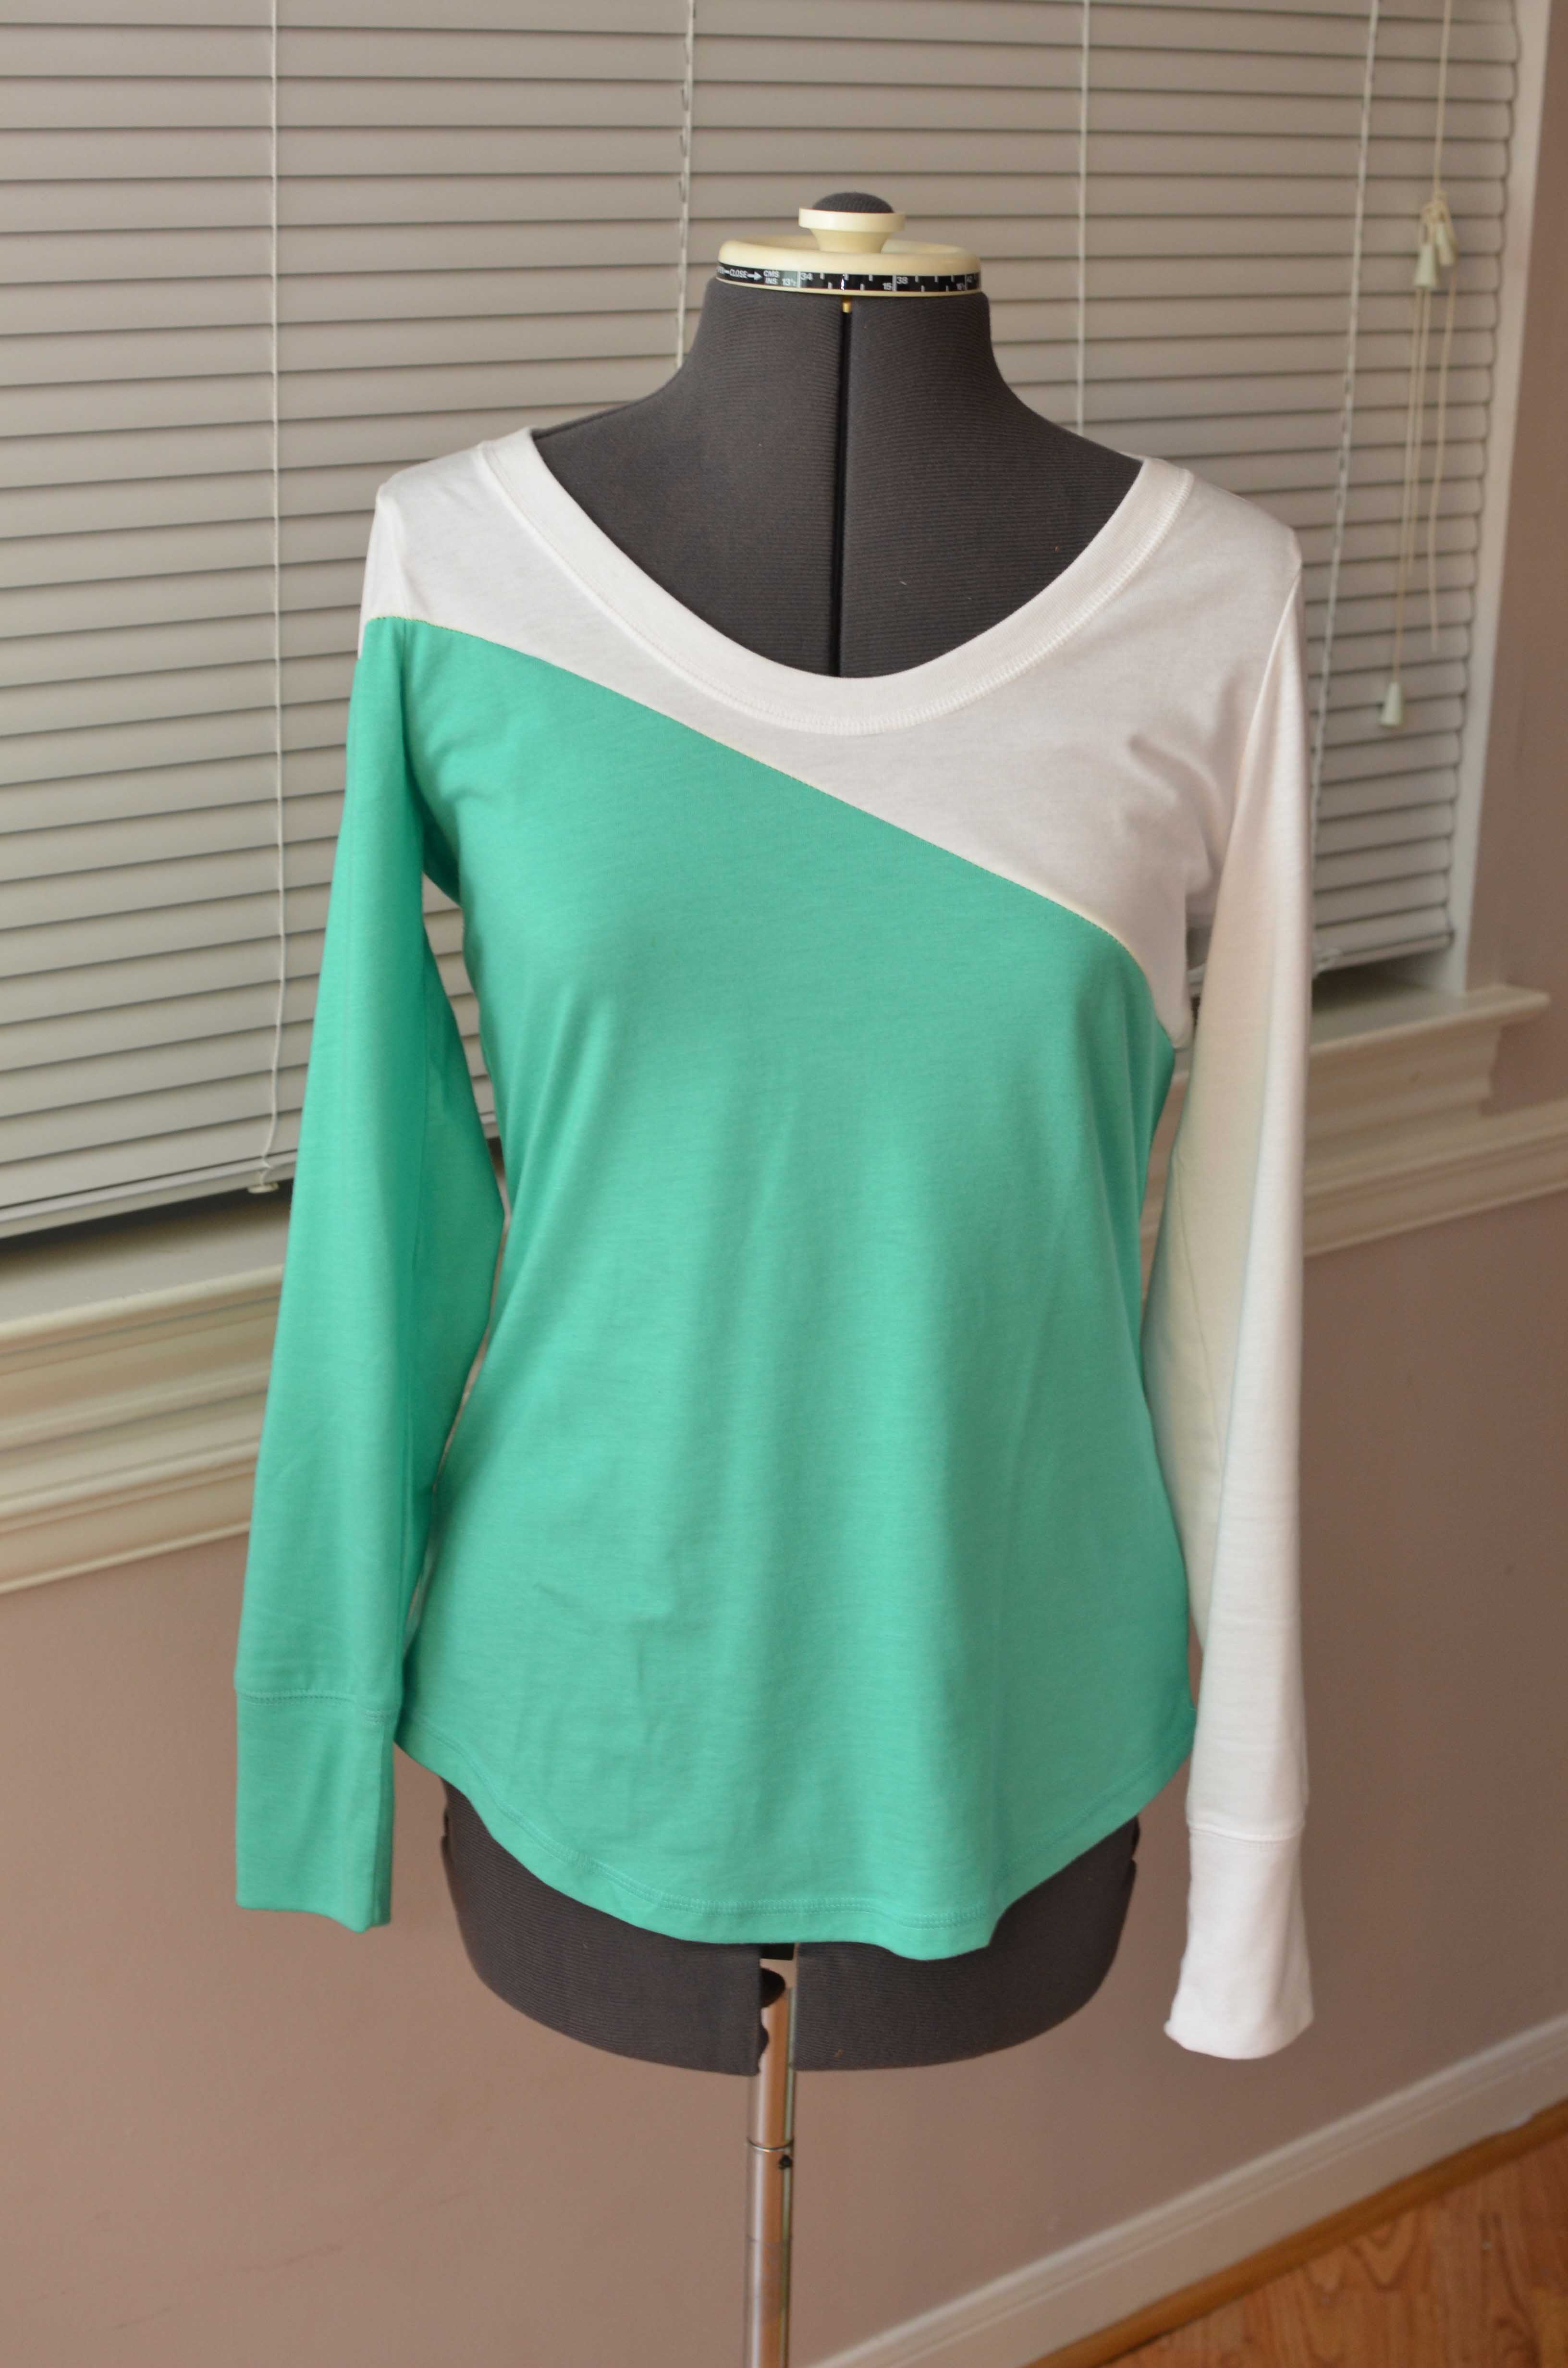
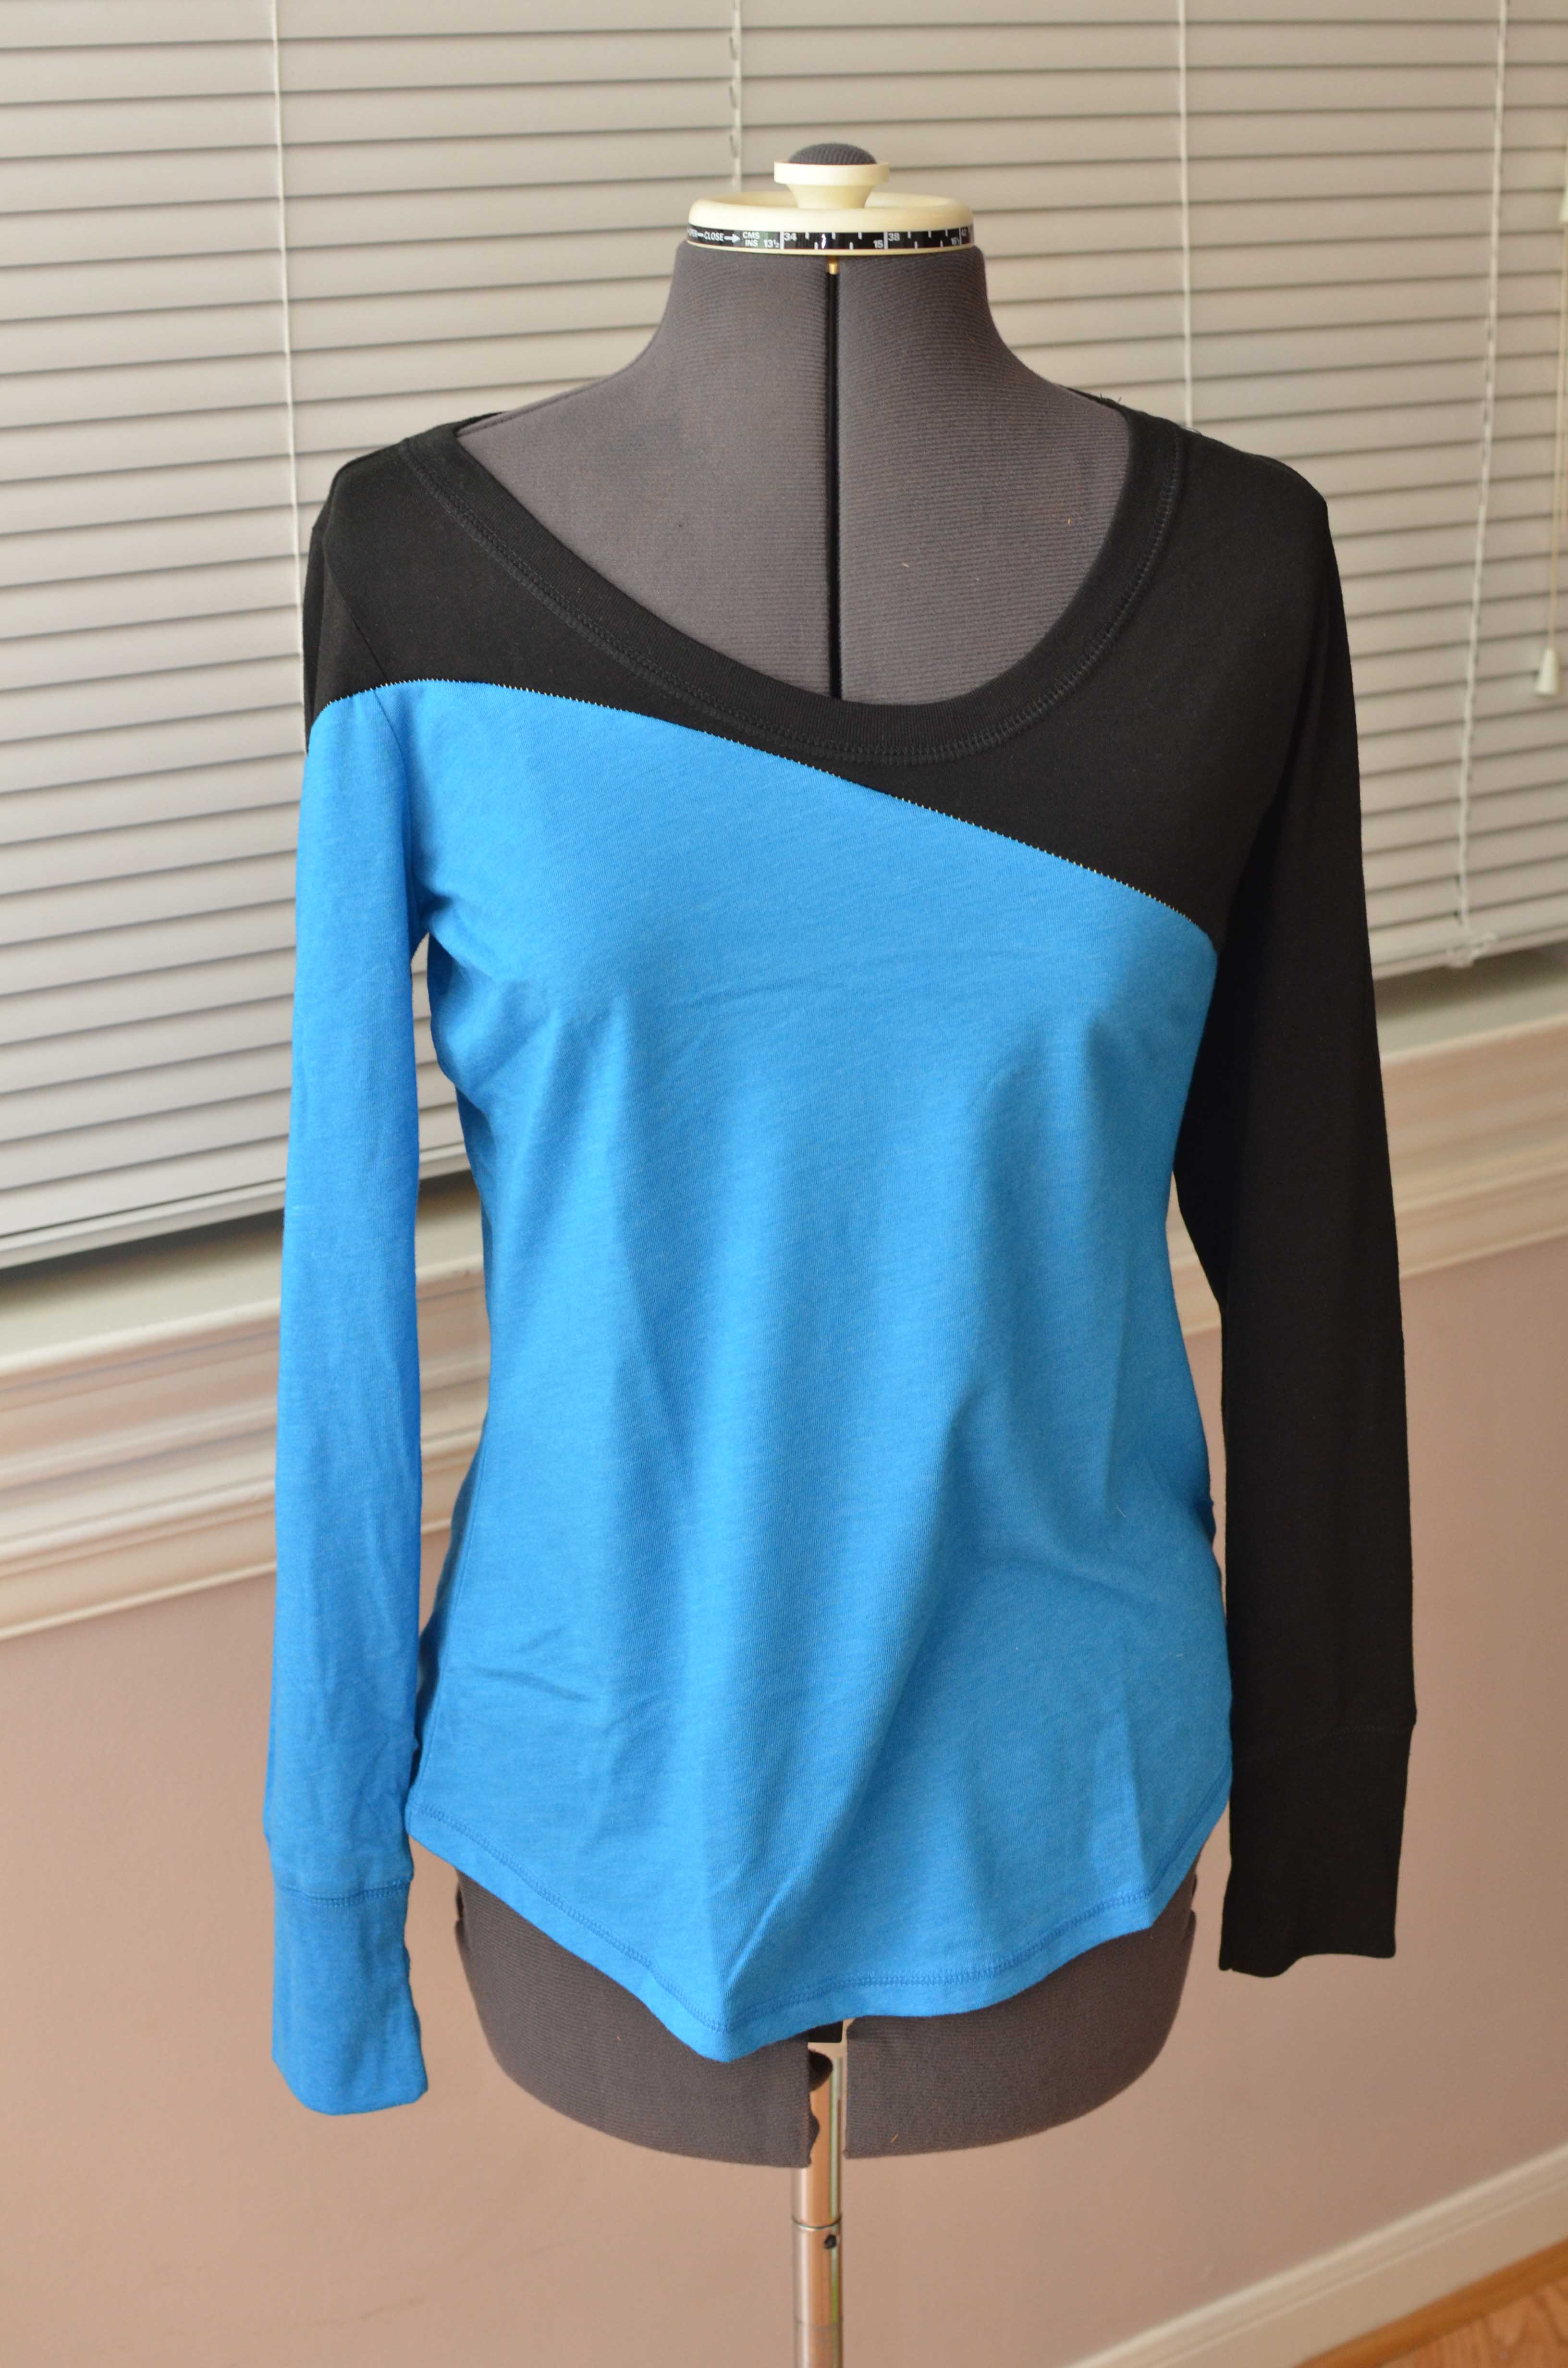
Here is the final result, I wanted to make sure the angle looked ok on a person and wasn’t too drastic before I cut the last two shirts.
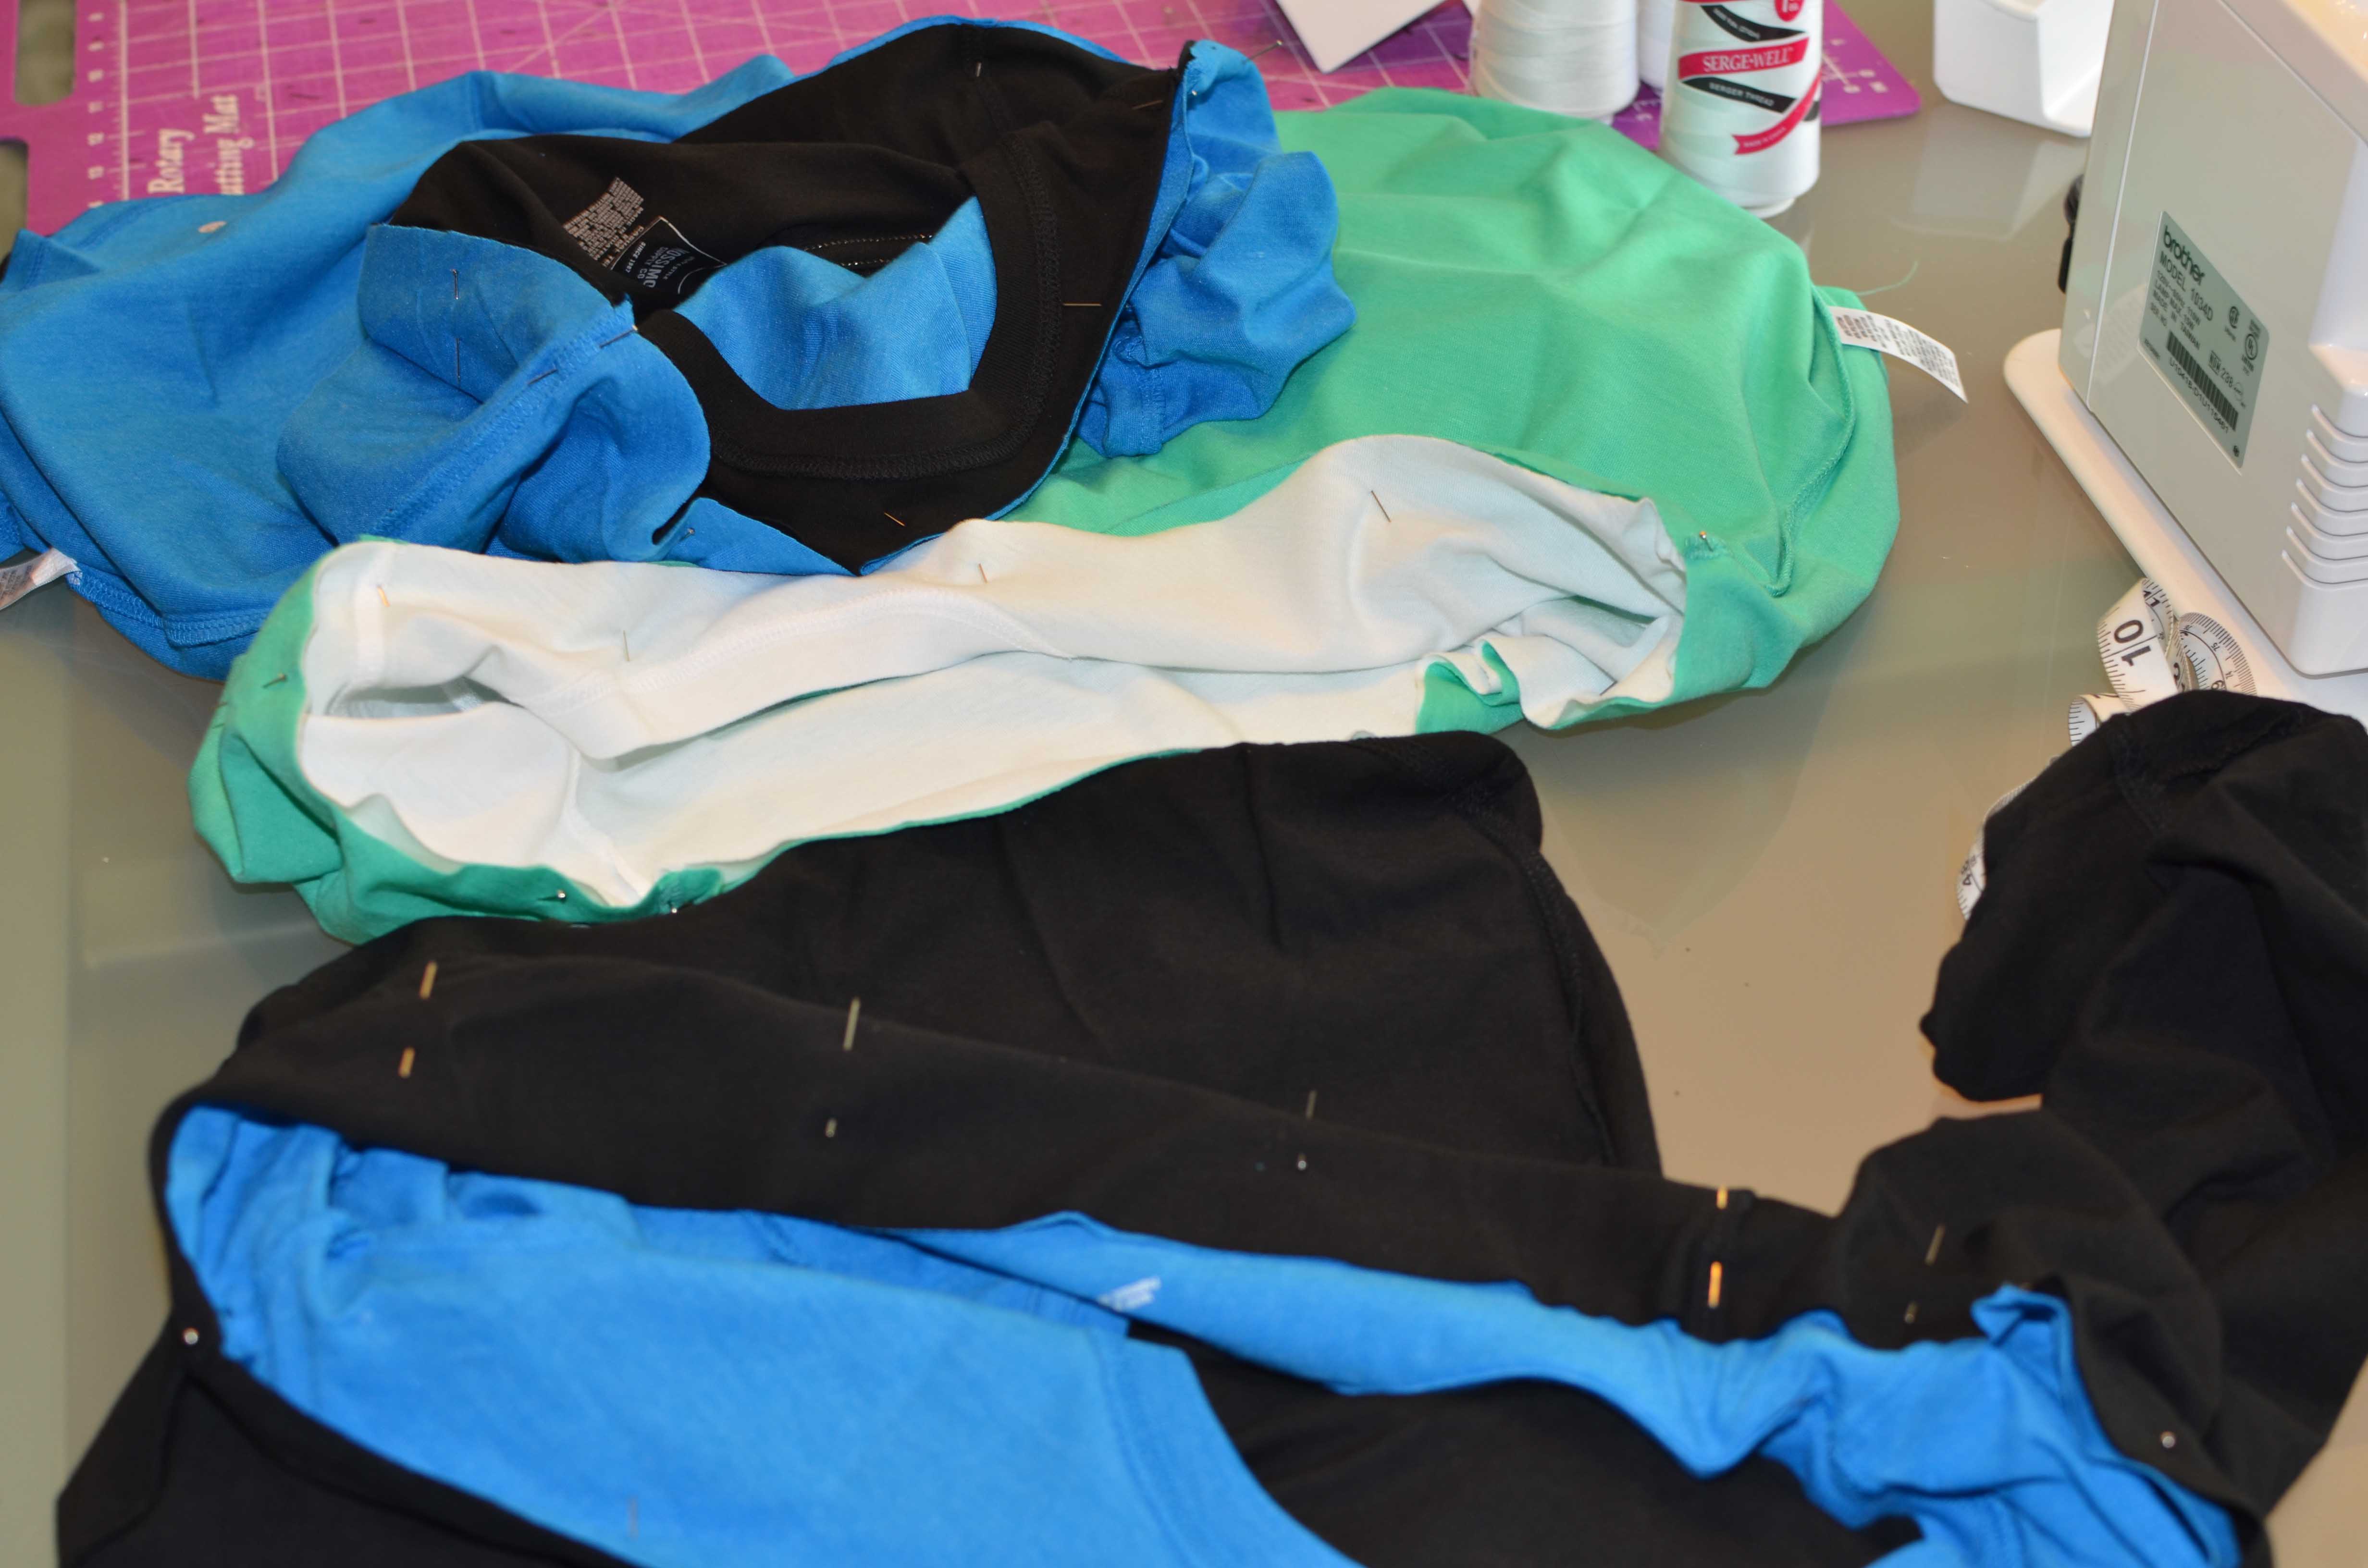
Then cut and pin all of the other shirts as shown above, then serge, and you have a bunch of fun shirts.
I was nervose about one of the sleeves being longer than the other since I am technically removing some of the fabric on one sleeve, but while wearing it, it didn’t look shorter.
If there is a drastic difference where you notice it, you can cut right above each cuff, and pin them higher and even so you have 3/4 sleeves, but on these it wasn’t necessary for me. Make sure the seam is on the inside just like we did with the diagonal portion.
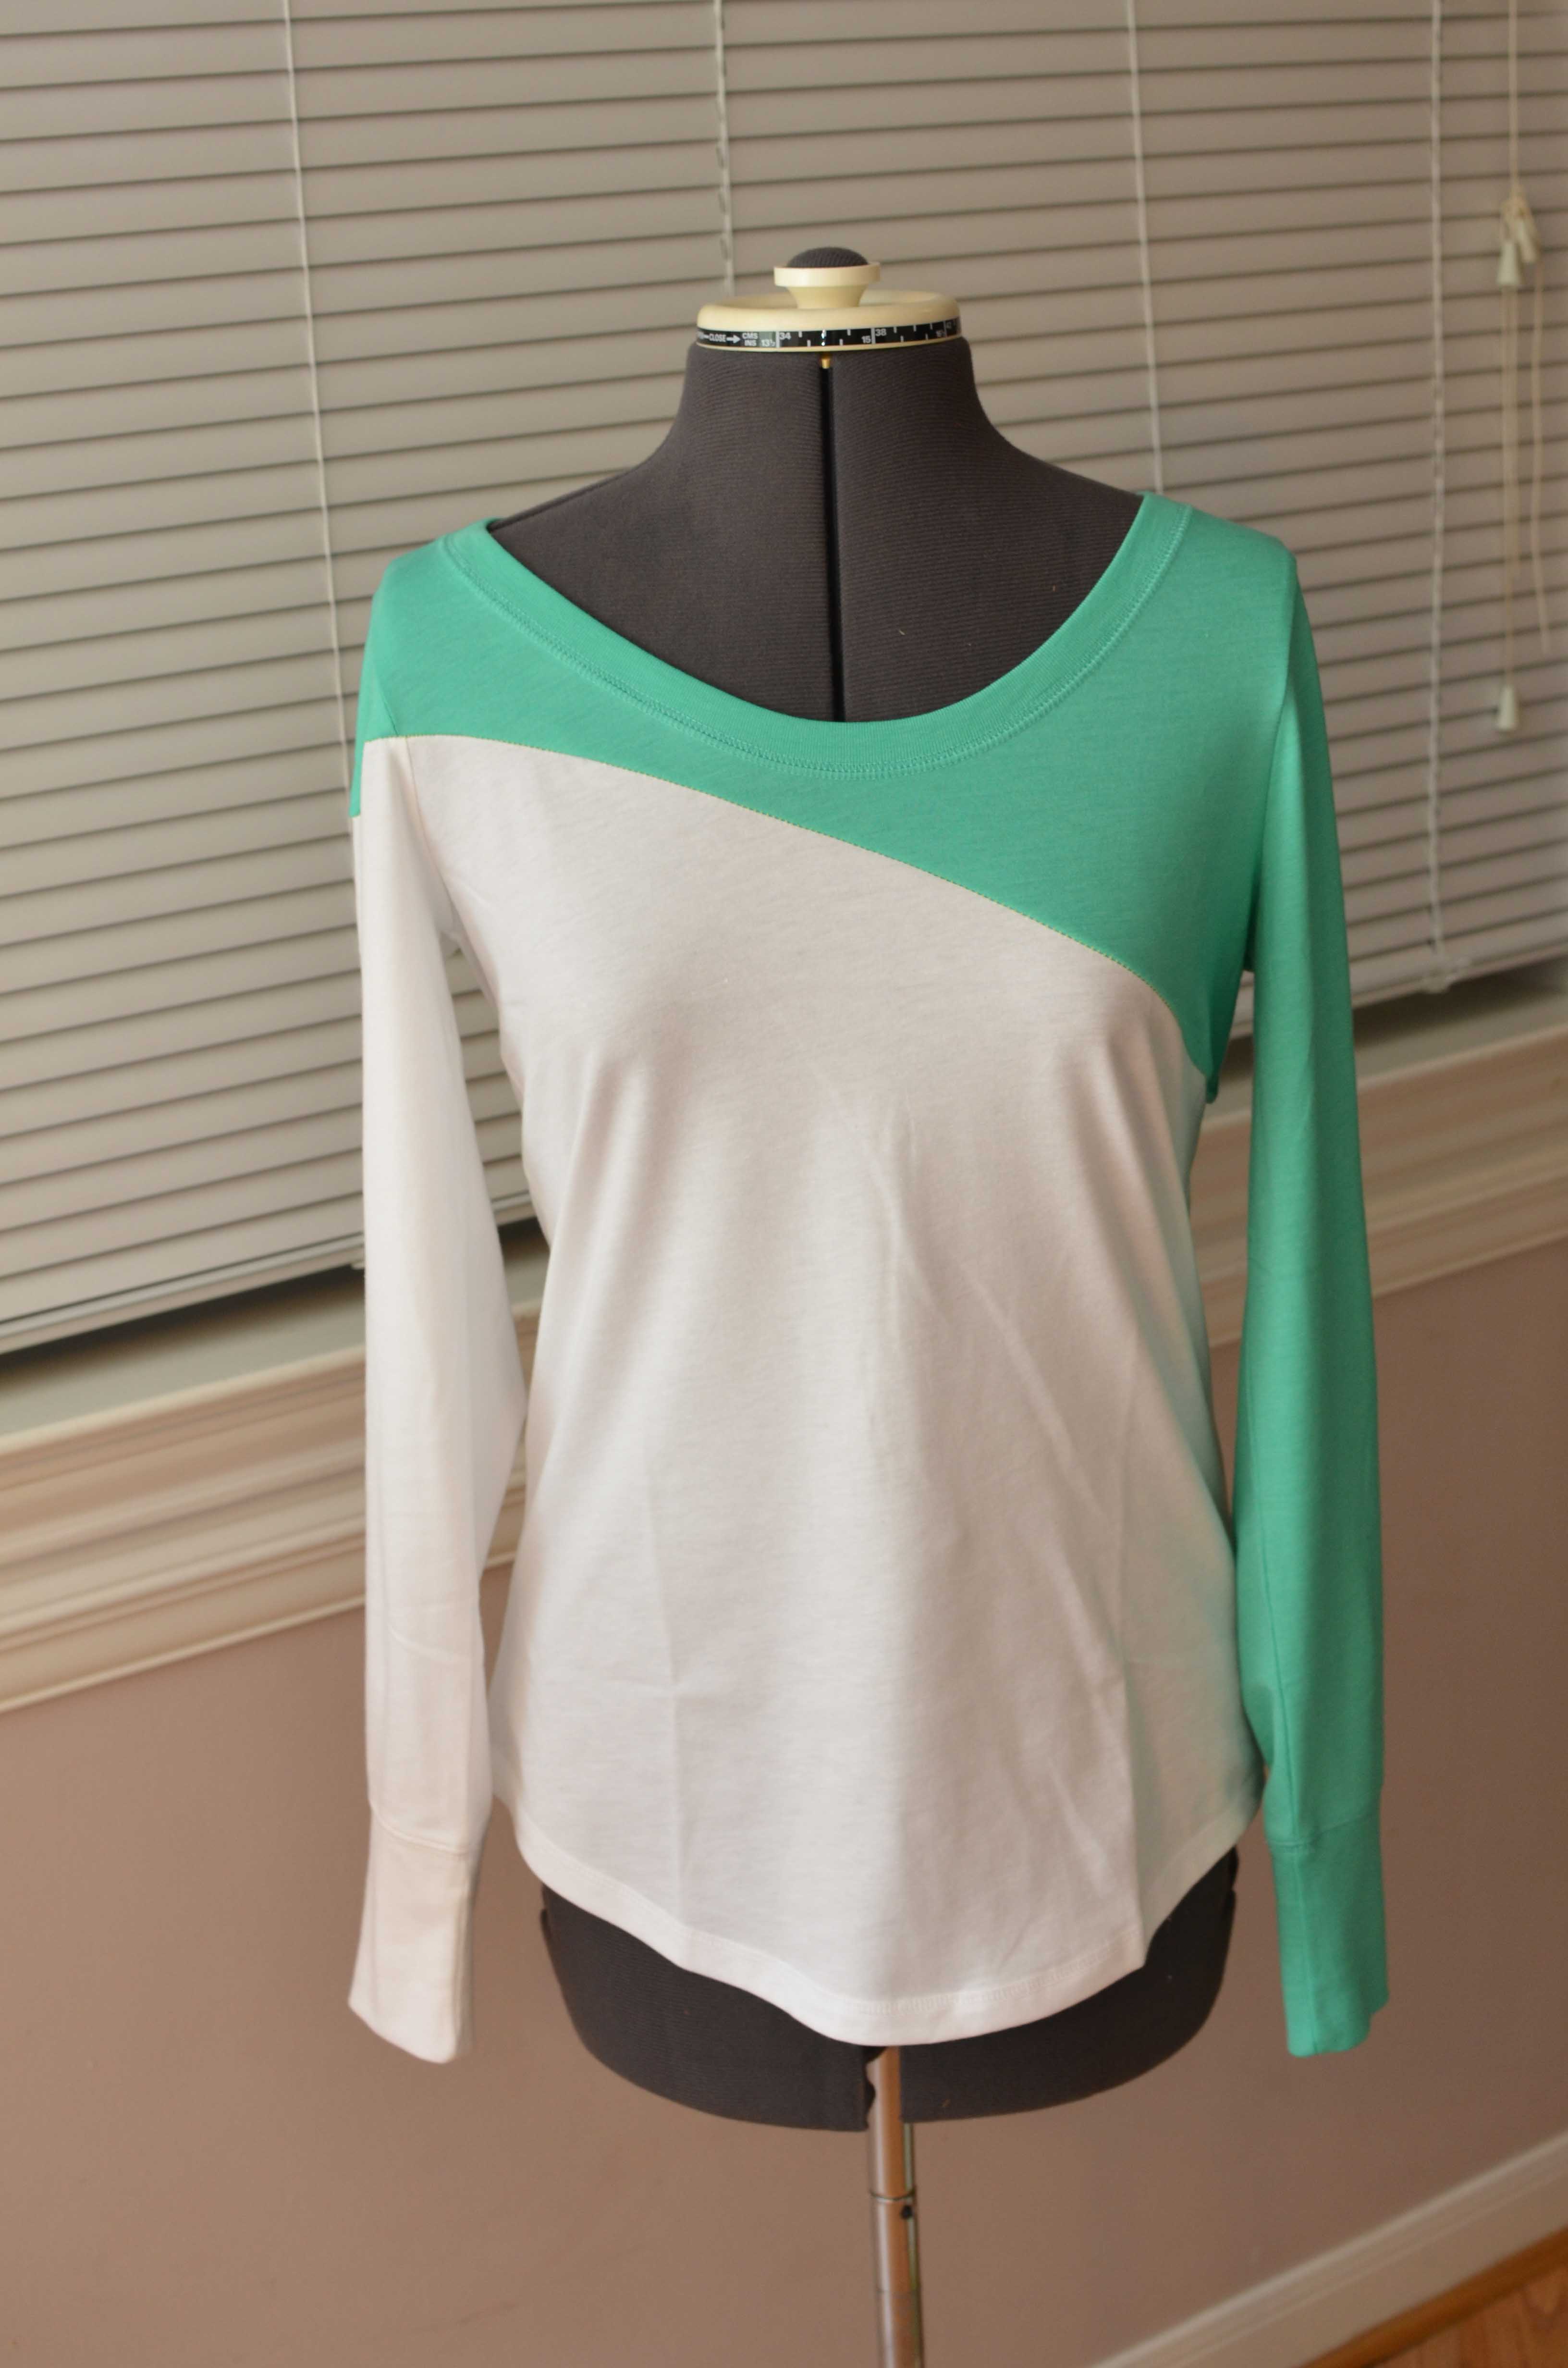
I should have mixed up the tops and bottoms more, but these are done, and I am not going to mess with them. No one else will know while I am wearing one that I didn’t mix my colors up well. 🙂

I am really happy with how these turned out, but I also want to warn that all of these were the exact same shirt in the same size, and if these wouldn’t have been the same, I don’t think they would have turned out as well.
Have you made any fun clothing pieces lately?

Read more at http://diyshowoff.com/2013/04/28/that-diy-party-1-2/#XXvy5DCBbBCG4v2i.99

![]()
Find other free shirt patterns here!
15 comments
These are fantastic! Such a great idea, and a perfect tutorial! Pinning now 🙂 Thanks for sharing!
Hannah ♫
Sew Lah Tea Dough
[…] best thing about these diagonal color-block t-shirts, except how gorgeous they are, is that you have two new fun shirts when you […]
Love, love, love this so much I featured your link on my blog. Thanks for sharing!
Karen @ annumography
I totally LOVE this idea! And yo ended up with TWO shirts! Brilliant!
And t-shirts are so comfy……. and diagonals are so flattering AND they are “in” too!!
You go girl!
LOVE this! I am pinning it, I think this would be so cute as a short sleeved t shirt for summer! Great idea!
genius! what a fun idea
Very cute! And what a great idea! I will be pinning this 🙂
I love the black and blue combination! You did a fantastic job with the tutorial. Thanks for sharing.
I love the colors you chose, and it looks great as an asymmetrical shirt! This is a great tutorial!
Thanks for linking up!
Thank you so much for linking up to Creative Showcase at Housewife Eclectic, I featured this post over here: http://www.housewifeeclectic.com/2013/05/creative-showcase-features-and-link-up.html
This is great! I am a DIY-aholic and it’s pretty much impossible for me to stay away from my sewing machine. I’m going to have to try this one!
Oooh! I love this! Now I want one, lol. Thanks so much for sharing and for entering One Crafty Contest!!
Supercute!!!
Love it! They seem pretty easy as well which is nice.
Love it ♡